Service Manuals, User Guides, Schematic Diagrams or docs for : . Car Manuals Subaru Impreza 2001-2002.2004-2007 Approved Subaru Impreza 2002 4 - Transmission

<< Back | Home

Most service manuals and schematics are PDF files, so You will need Adobre Acrobat Reader to view : Acrobat Download Some of the files are DjVu format. Readers and resources available here : DjVu Resources
For the compressed files, most common are zip and rar. Please, extract files with Your favorite compression software ( WinZip, WinRAR ... ) before viewing. If a document has multiple parts, You should download all, before extracting.
Good luck. Repair on Your own risk. Make sure You know what You are doing.


Image preview - the first page of the document
4 - Transmission


>> Download 4 - Transmission documenatation <<

Text preview - extract from the document
                                                                                I
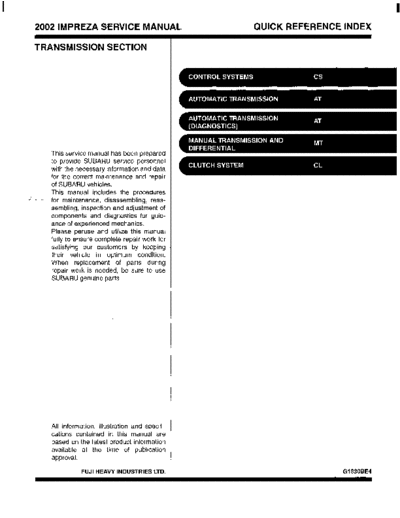
     2002 IMPREZA SERVICE MANUAL                      QUICK REFERENCE INDEX
 ~


 TRANSMISSION SECTION


         This service manual has been prepared
         to provide SUBARU service personnel
         with the necessary information and data
         for the correct maintenance and repair
         of SUBARU vehicles.
         This manual includes the procedures
c-   -   for maintenance, disassembling, reas-
         sembling, inspection and adjustment of
         components and diagnostics for guid-
         ance of experienced mechanics.
         Please peruse and utilize this manual
         fully to ensure complete repair work for
         satisfying our customers by keeping
         their vehicle in optimum condition.
         When replacement of parts during
         repair work is needed, be sure to use
         SUBARU genuine parts.


         All information, illustration and specifi-
         cations contained in this manual are
         based on the latest product information
         available at the time of publication
         approval.

                   FUJI HEAVY INDUSTRIES LTD.                        G1830BE4
                                                                                                                                 1


CONTROL SYSTEMS

                                                                                                       CSr
                                                                                                                          Page
         1.   General Description .................................................................................... 2
         2.   Electrical Component .................................................................................. 6
         3.   AT Shift Lock System .................................................................................. 8
         4.   Select Lever ..............................................................................................   23
         5.   Select Cable .............................................................................................. 26
         6.   AT Shift Lock Solenoid and "P" Position Switch ........................................ 29
         7.   Integrated Module ..................................................................................... 31
         8.   MT Gear Shift Lever .................................................................................. 32
         9.   General Diagostic......................................................................................       38
c-   .
                                          GENERAL DESCRIPTION
                                                                                                   I
CONTROL SYSTEMS

1. General Description
A: SPECIFICATIONS
I                               Item                            I        Specification        -1
I Vibration torque of rod against lever    N.m (kgf-m, ft-lb)   I   0.7 (0.07, 0.5) or less


                                                         cs-2
                            GENERAL DESCRIPTION
                                                                                                    I
                                                                          CONTROL SYSTEMS

B: COMPONENT
1. AT SELECT LEVER


                                             .
                                             `
                                                     ` . `
                                                      -`
                                                                I
                                                                I
                               .                        . `-A
                                                        `       `


                                                                                           TR054t


     Indicator light bulb      Cushion                     (25) Slider
     Detent arm                Guide plate                 (26) Clip
     Detent spring             Snap pin                    (27) "P" position switch
     Select lever              Outer cable                 (28) Spring
     Spring pin                Inner cable                 (29) Button
     Arm                       Nut B
     Pin                       Nut A                       Tightening torque: N.m (kgf-m, fi-lb)
     Plate                     Clip                          T1: 7.5 (0.76, 5.5)
     Grommet                   Lock plate                   T2: 13 (1.3, 9.4)
     Packing                   Shift lock solenoid           T3: l S ( 1 . 8 , 13.0)
     Grip                      Clamp                         T4: 33 (3.4,25)
     Indicator cover           Cover


                                         cs-3
I   CONTROL SYSTEMS
                             GENERAL DESCRIPTION

    2. MT GEAR SHIFT LEVER


                                                                                     TI30594


     (1)   Gear shift knob   (IO) O-ring A          (19)   Stay
     (2)   Console boot      (11) O-ring B          (20)   Spacer
    (3)    Plate complete    (12) BushA
    (4)    Lever             (13) Cushion rubber    Tightening torque: N-m (kgf-m, ft-lb)
    (5)    Bush              (14) Bush6              T1: 7.5 (0.76, 5.5)
    (6)    Bush              (15 ) Joint             T2: 12 (1.2, 8.7)
    (7)    Locking wire      (16) Rod                T3: lS(1.8, 13.0)
    (8)    Boot              (17) Bracket
    (9)    Snap ring         (18) Washer


                                             cs-4
                                      GENERAL DESCRIPTION                     I
                                                            CONTROL SYSTEMS

 C: CAUTION
   Wear working clothing, including a cap, protec-
tive goggles, and protective shoes during opera-
tion.
   Remove contamination including dirt and corro-
sion before removal, installation or disassembly.
   Keep the disassembled parts in order and pro-
tect them from dust or dirt.
   Before removal, installation or disassembly, be
sure to clarify the failure. Avoid unnecessary re-
moval, installation, disassembly, and replacement.
   Use SUBARU genuine grease etc. or the equiv-
alent. Do not mix grease etc. with that of another
grade or from other manufacturers.
   Be sure to tighten fasteners including bolts and
nuts to the specified torque.
   Place shop jacks or safety stands at the specified
points.
   Apply grease onto sliding or revolution surfaces
before installation.
c. Before installing O-rings or snap rings, apply suf-
ficient amount of grease to avoid damage and de-
formation.
   Before securing a part on a vice, place cushion-
ing material such as wood blocks, aluminum plate,
or shop cloth between the part and the vice.
   Before disconnecting electrical connectors, be
sure to disconnect the negative terminal from bat-
tery.


                                                     cs-5
I                             ELECTRICAL COMPONENT
    CONTROL SYSTEMS

    2. Electrical Component
    A: LOCATION


    (1)   Inhibitor switch     (4)   Key warning switch    (7)   Key lock solenoid
    (2)   Integrated module    (5)   Shift lock solenoid
    (3)   Stop light switch    (6)   "P" position switch


                                              CS-6
        ELECTRICAL COMPONENT
                                                 I
                               CONTROL SYSTEMS


                                     (2)


\ \o\    '   B2M2246E                TR0548


                                     TR0549


                        cs-7
                                                                                                                                           I
                                                AT SHIFT LOCK SYSTEM
CONTROL SYSTEMS

3. AT Shift Lock System
A: ELECTRICAL SPECIFICATION


                                                                             10 9   8    7   6   5   4   3    2   1
                      16 15 14 13 12 11 10 9                                 20 19 18 17 16 15 14 13 12 11


I                                                                                                                                BO031 1

                                                                                                    InpuVOutput signal
              Contents                    Connector No.       Terminal No.
                                                                                      Measured value and measuring conditions
        Battery power supply                  8281                2                                      9-16V
        Ignition power supply                 B280                19             10 - 15 V when ignition switch is at ON or START.
        Ignition power supply                 8280                10                  10 - 15 V when ignition switch is at ACC.
                                                                                        0 V when select lever is in " P position.
    Inhibitor Switch ("P" position)           8280                 5           9 - 16 V when select lever is in other positions than " P
                                                                                                         oosition.

          Stop light switch           I       B280        I        9
                                                                                        9 - 16 V when stop light switch is ON.
                                                                                           0 V when stop light switch is OFF.

I        "P" position switch          I       B280
                                                                                        0 V when select lever is in " P position.
                                                                               9 - 16 V when select lever is in other positions than "P"
                                                                                                         position.
                                                                                        8.5 - 16 V when shift lock is released.
      Shift lock solenoid signal              8281                 9
                                                                                            0 V when shift lock is oPeratina.
                                                                                                                         I


                                                                                            9 - 16 V when key is inserted.
     Key warning switch signal                6280                20
                                                                                                0 V when key is removed.
                                                                                7.5 - 16 V when turning ignition switch to ON, select
      Key lock solenoid signal                8281                 3                lever is in "P" position and brake switch is ON.
                                                                                          0 V at other conditions than above.      .
               Ground                         B281                4                                       -
               Ground                         B281                13                                      -


                                                                  CS-8
                               AT SHIFT LOCK SYSTEM
                                                                                               I
                                                                             CONTROL SYSTEMS

B: SCHEMATIC


              OQ


                              (2)
                            0
                            0  c--
                                --
                                                              L
                                                    (4)


 (1)   Ignition switch              (4)   integrated module   (7)   Shift lock solenoid
 (2)   Stop light switch            (5)   Inhibitor switch    (8)   "P" position switch
 (3)   Key warning switch           (6)   Key lock solenoid   (9)   Battery


                                                   cs-9
                                        AT SHIFT LOCK SYSTEM
CONTROL SYSTEMS

C: INSPECTION
                       Step                                 Check                      Yes               NO
      CHECK SHIFT LOCK.                          While brake pedal is           Go to step 2.     Inspect "SELECT
      1)Turn the ignition switch ON.             depressed, can select lever                      LEVER CANNOT
      2)Move the select lever to "P" position.   move from " P range to other                     BE SHIFT
                                                 positions?                                       LOCKED. 
!     CHECK SHIFT LOCK.                          While brake pedal is not         Inspect "SELECT Go to step 3 .
                                                 depressed, can select lever      LEVER SHIFT
                                                 move from "P" range to other LOCK CANNOT
                                                 positions?                       BE RELEASED.
                                                                                  
I     CHECK KEY INTERLOCK.                       When select lever is in other    Inspect "KEY     4 shift lock sys-
                                                                                                   T
                                                 than "P" position, does ignition INTERLOCK        em is normal.
                                                 switch turn to "LOCK position? DOES NOT BE
                                                 O when select lever is in " P LOCKED OR
                                                  r
                                                 position, does ignition switch RELEASED. 


                                                  cs-10
AT SHIFT LOCK SYSTEM
                       CONTROL SYSTEMS


       cs-11
                       AT SHIFT LOCK SYSTEM
CONTROL SYSTEMS

1. INTEGRATED MODULE POWER SUPPLY AND GROUND LINE
WIRING DIAGRAM:


                             r                0

                             P                0
                                              z


                                              I
                                     A:   @
                                                     I I
                                                    -
                                                    -


                                                    TR0551


                                 cs-12
                                        AT SHIFT LOCK SYSTEM                                                                         1
                                                                                                         CONTROL SYSTEMS
    ~


                      Step                                         Check                          Yes                  No
        CHECK FUSE (No. 3 , 4 and 11).                 s the fuse (No. 3,4 or 11)        3eplace the fuse So to step 2.
        1)Aemove the fuse (No. 3 , 4 and 11).          )lawn out?                        :No. 3, 4 or 11). If
                                                                                         he replaced fuse
                                                                                         :No. 3,4 or 11)
                                                                                         ias blown out eas
                                                                                         ly, repair short cir-
                                                                                         :uit in harness
                                                                                         letween fuse and
                                                                                         ntegrated module.
!       CHECK HARNESS CONNECTOR BETWEEN s the resistance less than 1                     30 to step 3.         Repair open circuit
        INTEGRATED MODULE AND BODY                     2?                                                      in harness
        GROUND.                                                                                                between inte-
        1)Turn the ignition switch to OFF.                                                                     grated module and
        2)Measure the resistance of harness between                                                            body ground.
        integrated module and chassis ground.
          Connector & terminal
           (8281) No. 4 - Chassis ground:
                         -
           (8281) No. 13 Chassis ground:
I       CHECK BATTERY POWER SUPPLY.                    s the voltage more than 9 V?      30 to step 4.        Repair open circuit
        1)Turn the ignition switch to ON (engine OFF).                                                        harness between
        2)Measure the voltages between integrated                                                             battery and inte-
        module and chassis ground.                                                                            grated module,
          Connector & terminal                                                                                and poor contact
           (8281) No. 1 (+) -    Chassis ground ( )
                                                  -:                                                          in coupling con-
                                                                                                              nector.
I       CHECK IGNITION POWER SUPPLY CIR-               s the voltage more than 9 V?      So to step 5.        Repair open circuit
        CUIT.                                                                                                 harness between
        1)Tufn the ignition switch to ACC.                                                                    battery and inte-
        2)Measure the voltage between integrated                                                              grated module,
        module and chassis ground.                                                                            and poor contact
          Connector & terminal                                                                                in coupling con-
           (8280) No. 10 (+) - Chassis ground ( )  -:                                                         nector.
>       CHECK IGNITION POWER SUPPLY CIR-               s the voltage more than 9 V?      Go to step 6.        Repair open circuit
        CUIT.                                                                                                 harness between
        1)Turn the ignition switch to ON (engine OFF).                                                        battery and inte-
        2)Measure the voltage between integrated                                                              grated module,
        module and chassis ground.                                                                            and poor contact
          Connector & terminal                                                                                in coupling con-
           (8281) No. 19 (+) -    Chassis ground ( )
                                                   -:                                                         nector.
i       CHECK POOR CONTACT.                            s there poor contact in power     Repair poor con-     Replace the inte-
                                                       ;upply and ground line circuit?   tact.                grated module.


                                                         CS-13
                             AT SHIFT LOCK SYSTEM
CONTROL SYSTEMS

2. SELECT LEVER CANNOT BE SHIFT LOCKED
WIRING DIAGRAM:


                                                       SBF-1


                                                                               STOP LIGHT


                  A: @
                  B: @ INTEGRATED MODULE


           I                 la1
                              I
                                                   1
                                                   I                          SHIFT LOCK

                              I                                               SOLENOID


                              I


                                                       Is
                                                       OC :WITHOUT CRUISE CONTROL MODEL
                                                       WC :WITH CRUISE CONTROL MODEL


                                                                                            TR0552


                                           cs-14
                                    AT SHIFT LOCK SYSTEM
                                                                                                     CONTROL SYSTEMS

                        Step                                     Check                      Yes                   No
I   CHECK STOP LIGHT SWITCH.                         Does the stop light turn ON?    Go to step 2.       Inspect the stop
    Depress the brake pedal.                                                                             light system.
2   CHECK HARNESS BETWEEN STOP LIGHT                 Is the resistance more than 1   Repair open circuit So to step 3.
    SWITCH AND INTEGRATED MODULE.                    MR?                             in harness
    1)Turn the ignition switch to OFF.                                               between inte-
    2)Disconnect the integrated and stoplight                                        grated module and
    switch connector.                                                                stop light switch.
    3)Measure the resistance of harness between
    stop light switch and integrated module.
      Connector & terminal
      Without cruise control model
       (864) NO. 1 - (B280) NO. 9:
      Without cruise control model
       (B65) NO. 3 - (8280) NO. 9:
3   CHECK HARNESS BETWEEN STOP LIGHT                 Is the resistance less than 1   Repair short circuit Go to step 4.
    SWITCH AND INTEGRATED MODULE.                    n?                              in harness
    Measure the resistance of harness between                                        between inte-
    stop light switch and chassis ground.                                            grated module and
      Connector & terminal                                                           stop light switch.
      Without cruise control model
       (B64) No. 1 - Chassis ground:
      Without cruise control model
       (B65) No. 3 - Chassis ground:
4   CHECK HARNESS BETWEENINTEGRATED                  Is the resistance more than 1   Repair open circuit Go to step 5.
    MODULE AND SHIFT LOCK SOLENOID.                  MR?                             in harness
    1)Disconnect the shift lock solenoid connector                                   between inte-
    2)Measure the resistance of harness between                                      grated module and
    integrated module and shift lock solenoid..                                      shift lock solenoid.
      Connector & terminal
       (B116) NO. 4 - (8281) NO. 9:
5   CHECK HARNESSBETWEENINTEGRATED                   Is the resistance less than 1   Repair short circuit Go to step 6.
    MODULE AND SHIFT LOCK SOLENOID.                  Q?                              in harness
    Measure the resistance of harness between                                        between inte-
    shift lock solenoid and chassis ground.                                          grated module and
      Connector & terminal                                                           shift lock solenoid.
        ( B l l 6 ) No. 4 - Chassis ground:
6   CHECK HARNESS BETWEEN SHIFT LOCK                 Is the resistance more than 1   Repair open circuit Go to step 7.
    SOLENOID AND CHASSIS GROUND.                     MR?                             in harness
    Measure the resistance of harness between                                        between shift lock
    shift lock solenoid and chassis ground.                                          solenoid and body
      Connector & terminal                                                           ground.
        (6116) No. 5 - Chassis ground:
7   CHECK SHIFT LOCK SOLENOID.                       Is the resistance between 10    Go to step 8.       Replace the shift
    Measure the resistance of shift lock solenoid    and 20 R?                                           lock solenoid.
    connector terminals.
      Terminal
        NO. 4 -NO. 5:
8   CHECK SHIFT LOCK SOLENOID.                       Does the shift lock solenoid    Go to step 9.       Replace the shift
    Connect the battery with shift lock solenoid     operate properly?                                   lock solenoid.
    connector terminal and operate solenoid.
      Terminal
                -
        NO. 4 (+) NO. 5 (-I   -)
9   CHECK POOR CONTACT.                              Is there poor contact in key    Repair poor con-    Replace the inte-
                                                     lock circuit?                   tact.               grated module.


                                                      CS-15
                        AT SHIFT LOCK SYSTEM
CONTROL SYSTEMS

3. SELECT LEVER SHIFT LOCK CANNOT BE RELEASED
WIRING DIAGRAM:


 INHIBITOR                                                                          STOP LIGHT
 SWITCH                                                                             SWITCH


                                                               I
                           A: @
                           B: @ INTEGRATED MODULE


                                         I                                          SHIFT LOCK
                                                                                         ~


                                          I                                         SOLENOID


                                         I


                                       B
  m                                                          n
                                                    11213]4]516171819110
                                                    11~12~13~14]15]16~17~18~19~20
                                 9 10 11 12


                                                                                       TR0553


                                    CS-16
                                     AT SHIFT LOCK SYSTEM                                                                         I
                                                                                                     CONTROL SYSTEMS
~       ~


                     Step                                       Check                       Yes                   No
    CHECK INHIBITOR SWITCH.                        ;ombination meter indicator       Go to step 2.        4djust inhibitor
    1)Turn the ignition switch to ON (engine OFF). amp and select lever " P , "R",                        ;witch and select
    2)Move the select lever from "P" "1" range. IN", " 3 , " 2 and "1" are cor-
                                      to                                                                  :able.
                                                   .ectly matched?
    CHECK HARNESS BETWEEN INHIBITOR                s the resistance less than 1      Repair short circuit 30 to step 3.
    SWITCH AND INTEGRATED MODULE.                  n?                                in harness
    1)Turn the ignition switch to OFF.                                               between inte-
    2)Disconnect the connector transmission har-                                     grated module and
    ness and intgrated module.                                                       transmission con-
    3)Measure the resistance of harness between                                      nector.
    integrated module and chassis ground.
      Connector & terminal
        (6280) No. 5 - Chassis ground:
    CHECK HARNESS BETWEEN INHIBITOR                s the resistance more than 1      Repair open circuit 30 to step 4.
    SWITCH AND INTEGRATED MODULE.                  WR?                               in harness
    Measure the resistance of harness between                                        between inte-
    integrated module and inhibitor switch.                                          grated module and
      Connector & terminal                                                           transmission con-
        (612) NO. 3 - (6280) NO. 5:                                                  nector
    CHECK HARNESS BETWEEN INHIBITOR                s the resistance less than 1      Go to step 5.       Sepair open circuii
    SWITCH AND CHASSIS GROUND.                     n?                                                    n harness
    Measure the resistance of harness between                                                            2etween inte-
    integrated module and chassis ground.                                                                Jrated module and
      Connector & terminal                                                                               :hassis ground.
        (612) No. 4-    Chassis ground:
    CHECK INHIBITOR SWITCH.                         s the resistance more than 1     Repair or replace    30 to step 6.
    1)Move the select lever to " P position.       w? n                              inhibitor switch.
    2)Measure the resistance of transmission har-
    ness connector terminals.
      Connector & terminal
        (T3) NO. 3 - NO. 4:
    CHECK OUTPUT SIGNAL FOR INTEGRAT- Is the voltage between 9 and                   Go to step 7.        30 to step 15.
    ED MODULE.                                     16 V?
     1)Connect all connectors.
    2)Turn the ignition switch to ON.
    3)Measure the voltage between integrated
    module and chassis ground.
      Connector & terminal
        (6280) No. 5 (+) - Chassis ground ( ) -:
    CHECK STOP LIGHT SWITCH.                       Does the stop light turn on?      Go to step 8.        Inspect stop light
    Depress the brake pedal.                                                                              iystem.
    CHECK HARNESS BETWEEN STOP LIGHT Is the voltage more than 9 V?                   Go to step 9.        Repair open or
    SWITCH AND AT SHIFT LOCK CONTROL                                                                      short circuit in har,
    MODULE.                                                                                               ness between inte
     1)Depress the brake pedal.                                                                           grated module ana
    2)Measure the voltage between integrated                                                              itop light switch.
    module and chassis ground.
      Connector & terminal
        (6280) No. 9 (+) - Chassis ground ( ) -:
    CHECK HARNESS BETWEENINTEGRATED Is the resistance more than 1                    Repair open circuit Go to step 10.
    MODULE AND SHIFT LOCK SOLENOID.                MR?                               in harness
     1)Turn the ignition switch to OFF.                                              between inte-
    2)Disconnect the connector from shift lock                                       grated module and
    solenoid and integrated module.                                                  shift lock solenoid.
    3)Measure the resistance of harness between
    integrated module and shift lock solenoid.
      Connector & terminal
        (6281) NO. 9 - (61161 NO. 4:


                                                     CS-17
I                                             AT SHIFT LOCK SYSTEM
    CONTROL SYSTEMS

                                Step                                       Check                      Yes                  No
    IO        CHECK HARNESS BETWEENINTEGRATEC                 Is the resistance less than 10   Go to step 11.     Repair short circui
              MODULE AND SHIFT LOCK SOLENOID.                 R?                                                  in harness
              Measure the resistance of harness between                                                           between inte-
              shift lock solenoid and chassis ground.                                                             grated module an(
                Connector & terminal                                                                              shift lock solenoid
                 (6281) No. 9 - Chassis ground:
    I1        CHECK HARNESS BETWEEN SHIFT LOCK                Is the resistance less than 1    Go to step 12.     Repair open circui
              SOLENOID AND CHASSIS GROUND.                    n?                                                  in harness
              Measure the resistance of harness between                                                           between shift lock
              shift lock solenoid and chassis ground.                                                             solenoid and chas
                Connector & terminal                                                                              sis ground.
                 ( 6 1 16) No. 5 - Chassis ground:
    12        CHECK SHIFT LOCK SOLENOID.                      Is the resistance between 10     Go to step 13.     Replace the shift
              Measure the resistance of shift lock solenoid   and 20 R?                                           lock solenoid.
              connector terminals.
                Terminal
                 NO. 4 - NO. 5:
    13        CHECK SHIFT LOCK SOLENOID.                      Is shift lock solenoid operating So to step 14.     Replace the shift
              Connect the battery with shift lock solenoid    properly?                                           lock solenoid.
              connector terminal and operate solenoid.
                Terminal
    -..
      .   .      NO. 4 (+) - NO. 5I- )
                                     (
    14        CHECK OUTPUT SIGNAL FOR AT SHIFT                Is the voltage more than 8.5 V? 30 to step 15.      Replace the inte-
              LOCK CONTROL MODULE.                                                                                grated module.
              1)Turnthe ignition switch to ON (engine OFF).
              2)Measure the voltage between integrated
              module and chassis ground.
                Connector & terminal
                 (6281) No. 9 (+) - Chassis groundI(   )
                                                       -
    5         CHECK POOR CONTACT.                             Is there poor contact in key     3epair poor con-   Replace the inte-
                                                              lock circuit?                    act.               grated module.


                                                              CS-18
AT SHIFT LOCK SYSTEM                     I
                       CONTROL SYSTEMS


       cs-19
                         AT SHIFT LOCK SYSTEM
CONTROL SYSTEMS

4. KEY INTERLOCK DOES NOT LOCK OR RELEASE
WIRING DIAGRAM:


                    (D
                                                >
                                                a
                    si                          E
                                                $ 0


c.


                                                    TR0554


                                cs-20
I                                   AT SHIFT LOCK SYSTEM
                                                                                                                                I
                                                                                                     CONTROL SYSTEMS

                   Step                                         Check                       Yes                  No
    CHECK HARNESS BETWEEN BATTERY                   s the voltage between 9 and      30 to step 2.      3epair open or
    AND KEY WARNING SWITCH.                         I6 V?                                               short circuit in har-
    1)Disconnectthe connector key warning                                                               less between bat-
    switch.                                                                                             :ery and key
    2)Measure the voltage of harness between key                                                        Narning switch.
    warning switch and chassis ground.
     Connector & terminal
       (874) No. 2 - Chassis ground:
    CHECK KEY WARNING SWITCH.                       Is the resistance more than 1    3eplace key warn- 30 to step 4.
    Measure the resistance of stop light switch     WR?                              ng switch.
    connector terminals.
      Terminal
       NO. 1 - NO. 2:
    CHECK KEY WARNING SWITCH.                       Is the resistance more than 1    30 to step 4.      Replace key warn-
    1)Remove the key.                               MR?                                                 ing switch.
    2)Measure the resistance of stop light switch
    connector terminals.
      Terminal
       NO. 1 - NO. 2:
    CHECK HARNESS BETWEEN AT SHIFT                  Is the resistance more than 9    30 to step 5.      Repair open circuit
    LOCK CONTROL MODULE AND KEY                     V?                                                  in harness
    WARNING SWITCH.                                                                                     between inte-
    1)Disconnectthe integrated module connector.                                                        grated module and
    2)Measure the voltage of harness integrated                                                         key warning
    module and chassis ground.                                                                          switch.
      Connector & terminal
       (8280) No. 20 - Chassis ground:
    CHECK HARNESS BETWEENINTEGRATED                 Is the resistance more than 1    Repair open circuit Go to step 6.
    MODULE AND KEY LOCK SOLENOID.                   MR?                              n harness
    1)Disconnectthe connector key lock solenoid.                                     setween inte-
    2)Measure the resistance of harness between                                      grated module and
    integrated module and key lock solenoid.                                         cey lock solenoid.
      Connector & terminal
       (873) NO. 2 - (8281) NO. 3:
    CHECK HARNESS BETWEEN INTEGRATED                Is the resistance more than 1    Go to step 7.       Repair short circuit
    MODULE AND KEY LOCK SOLENOID.                   R?                                                   in harness
    Measure the resistance of harness between                                                            between inte-
    integrated module and chassis ground.                                                                grated module and
      Connector & terminal                                                                               key lock solenoid.
       (B281) No. 3 - Chassis ground:
    CHECK HARNESS BETWEEN KEY LOCK                  Is the resistance less than 10   Go to step 8.       Repair open circuit
    SOLENOID AND CHASSIS GROUND.                    a?                                                   in harness
    Measure the resistance of harness between                                                            between key lock
    key lock solenoid and chassis ground.                                                                solenoid and chas
      Connector & terminal                                                                               sis ground.
        (873) No. 1 - Chassis ground:
    CHECK KEY LOCK SOLENOID.                        Is the resistance between 4      Go to step 14.      Replace the key
    Measure the resistance of key lock solenoid     and 8 R?                                             lock solenoid.
    connector terminals.
      Connector & terminal
        (873) NO. 1 -NO. 2:
    CHECK HARNESS BETWEEN "P" POSI-                 Is the resistance less than 1    Go to step 10.      Repair short circuil
    TION SWITCH AND CHASSIS GROUND.                 R?                                                   in harness
    Measure the resistance of harness between                                                            between "P" posi-
    " P position switch and chassis ground.                                                              tion switch and
      Connector & terminal                                                                               integrated module
        (8116) No. 2 - Chassis ground:


                                                     cs-21
                                          AT SHIFT LOCK SYSTEM
CONTROL SYSTEMS

                        Step                                           Check                     Yes                  No
IO       CHECK HARNESS BETWEEN AT SHIFT                    s the resistance more than 1   Repair open circuit Go to step 11.
         LOCK CONTROL MODULE AND "P" POSI-                 AQ?                            in harness
         TION SWITCH.                                                                     between inte-
         1)Disconnectthe connector from " P position                                      grated module and
         switch.                                                                          "P" position switch.
         2)Measure the resistance of harness between
         integrated module and " P position switch.
           Connector & terminal
            (B116) NO. 2 - (8280) NO. 6:
I1       CHECK HARNESS BETWEEN "P" POSI-                   s the resistance more than 1 IGo to step 12.       Repair open circuit
         TlON SWITCH AND CHASSIS GROUND.                   JIR?                                               in harness
         Measure the resistance of harness "P"position                                                        between "P" posi-
         switch and chassis ground.                                                                           tion switch and
           Connector & terminal                                                                               shassis ground.
            ( B l l 6 ) No. 6 - Chassis ground:
I2       CHECK "P" POSITION SWITCH.                        s the resistance less than 1   Go to step 13.      Replace the "P"
         1)Move the select lever to "P" position.          2?                                                 aosition switch.
         2)Measure resistance between " P position
         switch connector terminals.
           Terminal
            NO. 2 - NO. 6:
k    .   CHECK "P" POSITION SWITCH.                        s the resistance more than 1   Go to step 14.      Replace the "P"
         1)Move the select lever to other than "P" posi-   JIQ?                                               position switch.
         tion.
         2)Measure resistance between " P position
         switch connector terminals.
           Terminal
            NO. 2 - NO. 6:
 4       CHECK OUTPUT SIGNAL FOR INTEGRAT-                 s the voltage 7.5 and 16 V?    30 to step 15.      Replace the inte-
         ED MODULE.                                                                                           grated module.
         1)Connect all connectors.
         2)Turn the ignition switch to ON (engine OFF).
         3)Move the select lever to "P" position.
         4)Press the brake pedal.
         5)Measure the voltage between integrated
         module connector and chassis ground.
           Connector & terminal
            (8281) No. 3 (+) - Chassis ground (-):
I5       CHECK POOR CONTACT.                               s there poor contact in A shift Repair poor con-
                                                                                    T                         Replace the inte-
                                                           x k circuit?                    tact.              grated module.


                                                           cs-22
                                            SELECT LEVER
                                                                                                                   I
                                                                                         CONTROL SYSTEMS

4. Select Lever                                         B: INSTALLATION
                                                        1) Mount the select lever onto the vehicle body.
A: REMOVAL                                              2) Tighten the four bolts to install the select lever to
1) Set the vehicle on the lift.                         the vehicle body, then connect the connector.
2) Disconnect the ground terminal from battery.
                                                        Tightening torque:
3) Move the select lever to the "N" position.
                                                          13 N.m (1.3 kgf-m, 9.4 ft-lb)
4) Lift-up the vehicle.
5) Remove the rear exhaust pipe and muffler.
6) Remove the heat shield cover. (If equipped)
7) Disconnect the cable from select lever and then
remove the cable bracket.


                                                        3) Install the console box. 
                                                        4) Set the location of select lever at `IN" position.
                                                        5) Lift-up the vehicle.
                                                        6) Set the location of range select lever to "N" posi-
       (A) Adjusting nuts                               tion.
       (B) Cable bracket                                7) Insert the thread portion of the other inner cable
                                                        and into the connector hole of the select lever, and
8) Lower the vehicle.                                   fix the other outer cable end to the bracket.
9) Remove the console box.                                     ADJUSTMENT, Select Cable.>
10) Disconnect the connectors, then remove the          9) After completion of fitting, make sure that the se-
four bolts to take out the select lever assembly from   lect lever operates smoothly all across the operat-
the body.                                               ing range.
                                                        10) Inspect the following items. If the following in-
                                                        spection reveals problems, adjust the select cable
                                                        and inhibitor switch.  and 
                                                            (1) The engine starts operating when select le-
                                                            ver is in position "P",but not in other positions.
                                                            (2) The back-up light is lit when the select lever
                                                            is in position `W, but not in other positions.
                                                            (3) Select lever and indicator positions are
                                            I1510
                                                            matched.
                                                        11) Check the shift-lock system.
                                                            (1) Ensure the ignition switch rotates from
                                                            "ACC" to "LOCK when the select lever is set at
                                                            "P". Also check that ignition key can be removed
                                                            only from the "LOCK position.
                                                            (2) Ensure the select lever moves from "P" to
                                                            any other position when the brake pedal is de-
                                                            pressed with ignition key set at "ON" or
                                                            "START.
                                                        12) Install heat shield cover. (If equipped)
                                                        13) Install rear exhaust pipe and muffler.


                                                    CS-23
                                             SELECT LEVER
                                                                                                            I
CONTROL SYSTEMS

C: DISASSEMBLY                                           6) Remove the lock plate.
1) Remove the grip.
2) Remove the indicator light and then remove the                                            n
indicator cover.
NOTE:
Be careful not to break the indicator light during re-
moval.


                                                                                         v
                                                                                                 TR0556

                                                         7) Remove the pattern plate.


                                        B3M1511A


             (A) Grip
c.   ~       (B) Indicator cover
             (C) indicator light

3) Remove the slider.                                                                            TR0557
4) Remove the clips and then remove the guide
                                                         8) Remove the clip and remove the "P" position
plate.                                                   switch.
         I


         I                              B3M2177A


             (A) Clips
                                                               (A) Clip
             (B) Guide plate
                                                               (B) "P" position switch
5) Remove the clamp, and shift lock solenoid.            9) Remove the cap and then extract straight pin.


         I                                 TR0555
                                                                                               B3M1797A

             (A) Clamp
                                                               (A) Straight pin
             (B) Shift lock solenoid
                                                               (B) Select lever lower

                                                    CS-24
                                                                               I
                                              SELECT LEVER
                                                             CONTROL SYSTEMS

10)Remove the select lever lower then take away
the select lever upper from plate.


                                 dA'     B3M1848A


       (A) Select lever lower
       (B) Select lever upper
       (C) Plate

1 1 ) Remove the spring and remove the detent arm.


       (A) Detent arm
       (B) Spring

12)Remove the cushion.
D: ASSEMBLY
1) Clean all parts before assembly.
2) Apply grease [NIGTIGHT LYW No. 2 or equiva-
lent] to each parts. 
3) Assembly is in the reverse order of disassembly.
4) After completion of fitting, transfer the select le-
ver to range "P" - "l", then check whether the in-
dicator and select lever agree, whether the pointer
and position mark agree and what the operating
force is.
E: INSPECTION
1) Inspect the removed parts by comparing with
new ones for deformation, damage and wear. Cor-
rect or replace if defective.
2) Confirm the following parts for operating condi-
tion before assembly. Moving condition of the se-
lector lever upper, it should move smoothly.


                                                     CS-25
I                                                                                                               I
                                              SELECT CABLE
    CONTROL SYSTEMS

    5. Select Cable                                       10) Disconnect the cable from select lever and then
                                                          remove the cable bracket.
    A: REMOVAL
    1) Set the vehicle on the lift.
    2) Disconnect the ground terminal from battery.
    3) Prior to removal, set the lever to "N" position.
    4) Lift-up the vehicle.
    5) Remove the front and center exhaust pipe. (Non-
    turbo model) 
    CAUTION:
    When removing the exhaust pipes, be careful
    each exhaust pipe does not drop out.
    6) Remove the center exhaust pipe. (Turbo model)             (A) Adjusting nuts
    
    7) Remove' the heat shield cover. (If equipped)       11) Remove the select cable from plate assembly.
    8) Remove the snap pin from range select lever.


           (A) Range select lever
           (B) Snap pin
           (C) Select cable
           (D) Clamp
    9) Remove the plate assembly from transmission
    case


           (A) Select cable
           (B) Plate ASSY
           (C) Clamp


                                                      CS-26
I                                                 SELECT CABLE
                                                                                                                       I
                                                                                              CONTROL SYSTEMS

     B: INSTALLATION                                          C: INSPECTION
     1) Install the select cable to plate assembly.           Check the removed cable and replace if damaged,
                                                              rusty, or malfunctioning.
     Tightening torque:
                                                              1) Check for smooth operation of the cable.
        32 N.m (3.3 kgf-m, 24 fi-lb)
                                                              2) Check the inner cable for damage and rust.
     2) Install the select cable to range select lever.       3) Check the outer cable for damage, bends, and
     3) Install the plate assembly to transmission.           cracks.
     Tightening torque:                                       4) Check the boot for damage, cracks, and deterio-
       T: 24.5 N-m (2.5 kgf-m, 18.1 ft-lb)                    ration.
                                                              5) Move the select lever from "P" position to "1" po-
                                                              sition. You should be able to feel the detentes in
                                                              each position. If the detentes cannot be felt or the
                                                              position pointer is improperly aligned, adjust the ca-
                                                              ble.
                                                              D: ADJUSTMENT
                                                              1) Set the vehicle on the lift.
                                                              2) Disconnect the ground terminal from battery.
                                                              3) Set the lever to "N" position.
                                                              4) Lift-up the vehicle.
    c.
                                                              5) Remove the rear exhaust pipe and muffler.
            (A) Select cable                                  6) Remove the heat shield cover. (If equipped)
            (B) Plate ASSY                                    7) Loosen the adjusting nut on each side.

     4) Install the snap pin to range select lever


                                                                  I /                                 03M1792A


                                                                     (A) Adjusting nut A
                                                                     (B) Adjusting nut B
            (A)   Range select lever
            (B)   Snap pin
            (C)   Select cable
            (D)   Clamp

     5) Move the select lever to the "N" position, then ad-
     just the select cable position. 
     6) Install the heat shield cover. (If equipped)
     7) Install the front and center exhaust pipe. (Non-
     turbo model) 
     8) Install the center exhaust pipe. (Turbo model)


                                                          CS-27
I                                                  SELECT CABLE
    CONTROL SYSTEMS

    8) Turn the adjusting nut B until it lightly touches the
    connector.


           (A)   Front side
           (B)   Select lever
           (C)   Connector
           (D)   Adjusting nut B
           (E)   Contact point
           (F)   Adjusting nut A

    S).While preventing the adjusting nut B from mov-
    ing with a wrench, tighten adjusting nut A.
    Tightening torque:
      7.5 N.m (0.76 kgf-m, 5.5 ft-lb)


           (A) Adjusting nut A
           (B) Adjusting nut B

    10) After completion of fitting, make sure that the
    select lever operates smoothly all across the oper-
    ating range.
    11) Install in the reverse order of removal.


                                                          CS-28
                AT SHIFT LOCK SOLENOID AND "P" POSITION SWITCH                                       I
                                                                                   CONTROL SYSTEMS

6. AT Shift Lock Solenoid and                       6 : INSTALLATION
   "P" Position Switch                              Install in the reverse order of removal.

A: REMOVAL
1) Disconnect the ground terminal from battery.
2) Remove the console box. 
3) Disconnect the connector.
4) Remove the grip.
5 ) Remove the indicator cover.


6) Remove the slider.
7) Remove the cushion.
8) Remove the clip and remove the "P" position
switch.


      (A) Clip
      (B) " P position switch

9) Remove the clamp and remove the shift lock so-
lenoid.


      (A) Clamp
      (B) Shift lock solenoid

                                               CS-29
I                AT SHIFT LOCK SOLENOID AND "P" POSITION SWITCH
    CONTROL SYSTEMS

    C: INSPECTION
                          Step                                          Check
    1     CHECK SHIFT LOCK SOLENOID.
          Measure the resistance of shift lock solenoid     and 20 R?                                        lock solenoid and
          connector terminals.                                                                               " P position switch
            Terminal                                                                                         assembly.
             NO. 4 - NO. 5
    2     CHECK SHIFT LOCK SOLENOID.                        Is the shift lock solenoid oper- Go to step 3.   Replace the shift
          Connect the battery with shift lock solenoid      ating properly?                                  lock solenoid and
          connector terminal, operate solenoid.                                                              " P position switch
            Terminal                                                                                         assembly.
              NO. 4 (+) - NO. 5 (-)
    3     CHECK "P" POSITION SWITCH.                        Is the resistance less than 1   Go to step 4.    Replace the " P
          1)Move the select lever to " Pposition.           n?                                               position switch.
          2)Measure resistance between " P position
          switch connector terminals.
    4     CHECK "P" POSITION SWITCH.                        Is the resistance more than 1   Normal           Replace the "P"
          1)Move the select lever to other than "P" posi-   MR?                                              position switch.
          tion.
          2)Measure resistance between "P" position
          switch connector terminals.


                                                             CS-30
                                      INTEGRATED MODULE
                                                                                                        I
                                                                                      CONTROL SYSTEMS

7. Integrated Module                                   B: INSTALLATION
                                                       Install in the reverse order of removal.
A: REMOVAL
1 ) Disconnect the ground terminal from battery.


2 ) Remove the lower cover.


3) Remove the knee bolster.


4) Disconnect the connector from integrated mod-
ule.
5) Remove the integrated module.


                                                   CS-31
I                                       MT GEAR SHIFT LEVER
                                                                                                            I
    CONTROL SYSTEMS

    8. MT Gear Shift Lever                               11) Remove the cushion rubber from body.

    A: REMOVAL
    1) Set the vehicle on the lift.
    2) Remove the gear shift knob.


◦ Jabse Service Manual Search 2024 ◦ Jabse PravopisonTap.bg ◦ Other service manual resources online : FixyaeServiceinfo