Service Manuals, User Guides, Schematic Diagrams or docs for : . Car Manuals Subaru Legacy 1995-1999 Approved Subaru Legacy 1996 1996 Service Manual ENGINE SECTION ENGINE LUBRICATION SYSTEM MSA5TCD96L5991
<< Back | HomeMost service manuals and schematics are PDF files, so You will need Adobre Acrobat Reader to view : Acrobat Download Some of the files are DjVu format. Readers and resources available here : DjVu Resources
For the compressed files, most common are zip and rar. Please, extract files with Your favorite compression software ( WinZip, WinRAR ... ) before viewing. If a document has multiple parts, You should download all, before extracting.
Good luck. Repair on Your own risk. Make sure You know what You are doing.
Image preview - the first page of the document
>> Download MSA5TCD96L5991 documenatation <<
Text preview - extract from the document
  SERVICE PROCEDURE                                                2-4
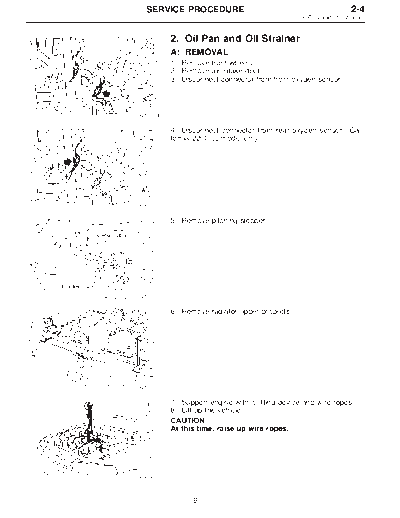
                                              2. Oil Pan and Oil Strainer


          2. Oil Pan and Oil Strainer
          A: REMOVAL
          1) Remove front wheels.
          2) Remove air intake duct.
          3) Disconnect connector from front oxygen sensor.


B2M0724


          4) Disconnect connector from rear oxygen sensor. (Cali-
          fornia 2200 cc model only)


B2M0725


          5) Remove pitching stopper.


G2M0295


          6) Remove radiator upper brackets.


B2M0320


          7) Support engine with a lifting device and wire ropes.
          8) Lift-up the vehicle.
          CAUTION:
          At this time, raise up wire ropes.


B2M0053


                9
2-4                              SERVICE PROCEDURE
2. Oil Pan and Oil Strainer


                                         9) Drain engine oil.
                                         Set container under the vehicle, and remove drain plug
                                         from oil pan.


                              G2M0066


                                         10) Disconnect connector from rear oxygen sensor.
                                         (Except California 2200 cc model)


                               B2M0312


                                         11) Remove front exhaust pipe.
                                            (1) Separate front catalytic converter from center
                                            exhaust pipe.
                                            (2) Remove front exhaust pipe from engine.
                                            (3) Remove bolt which installs front exhaust pipe on
                                            bracket.


                               B2M0054


                                         12) Remove nuts which install front cushion rubber onto
                                         front crossmember.


                              B2M0743A


                                         13) Remove bolts which install oil pan on cylinder block
                                         while raising up engine.
                                         14) Insert oil pan cutter blade between cylinder block-to-oil
                                         pan clearance.
                                         CAUTION:
                                         Do not use a screwdriver or similar tool in place of oil
                                         pan cutter.


                              G2M0081


                                               10
  SERVICE PROCEDURE                                                 2-4
                                               2. Oil Pan and Oil Strainer


          15) Separate oil strainer from oil strainer stay.


G2M0082


          16) Remove oil strainer.


G2M0376


          17) Remove baffle plate and oil strainer stay.


G2M0377


          B: INSPECTION
          By visual check make sure oil pan, oil strainer, oil strainer
          stay and baffle plate are not damaged.


          C: INSTALLATION
          CAUTION:
          Before installing oil pan, clean sealant from oil and
          engine block.
          1) Install baffle plate and oil strainer stay.
          Tightening torque:
             5 Nm (0.5 kg-m, 3.6 ft-lb)

G2M0377


                11
2-4                              SERVICE PROCEDURE
2. Oil Pan and Oil Strainer


                                         2) Install oil strainer onto baffle plate.
                                         CAUTION:
                                         Replace O-ring with a new one.
                                         Tightening torque:
                                            9.8 Nm (1.0 kg-m, 7 ft-lb)


                              G2M0376


                                         3) Hold oil strainer to oil strainer stay.
                                         Tightening torque:
                                            9.8 Nm (1.0 kg-m, 7 ft-lb)


                              G2M0082


                                         4) Apply fluid packing to mating surfaces and install oil
                                         pan.
                                         Fluid packing:
                                             THREE BOND 1207C or equivalent


                              G2M0084


                                         5) Tighten bolts which install oil pan onto engine block.
                                         Tightening torque:
                                            9.8 Nm (1.0 kg-m, 7 ft-lb)
                                         6) Tighten drain plug.
                                         Tightening torque:
                                            44 +4.8 Nm (4.5 +0.5 kg-m, 33 +3.6 ft-lb)
                                                 0              0              0
                                         CAUTION:
                                         Replace drain plug gasket with new one.
                              G2M0081


                                         7) Lower engine onto front crossmember.
                                         8) Tighten nuts which install front cushion rubber onto front
                                         crossmember.
                                         Tightening torque:
                                            69
◦ Jabse Service Manual Search 2026 ◦ Jabse Pravopis ◦ onTap.bg ◦ Other service manual resources online : Fixya ◦ eServiceinfo