Service Manuals, User Guides, Schematic Diagrams or docs for : . Car Manuals Subaru Legacy 1995-1999 Approved Subaru Legacy 1996 1996 Tech Service Bulletin 17-06-0134513
<< Back | HomeMost service manuals and schematics are PDF files, so You will need Adobre Acrobat Reader to view : Acrobat Download Some of the files are DjVu format. Readers and resources available here : DjVu Resources
For the compressed files, most common are zip and rar. Please, extract files with Your favorite compression software ( WinZip, WinRAR ... ) before viewing. If a document has multiple parts, You should download all, before extracting.
Good luck. Repair on Your own risk. Make sure You know what You are doing.
Image preview - the first page of the document
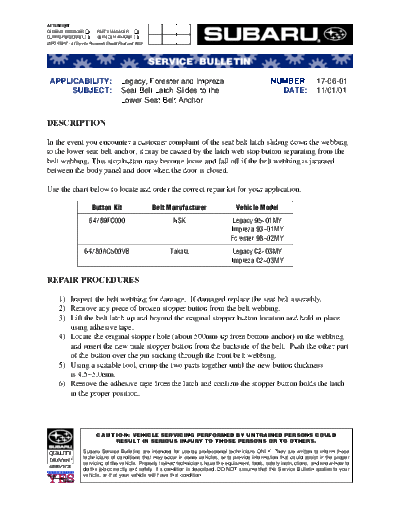
>> Download 17-06-0134513 documenatation <<
Text preview - extract from the document
ATTENTION:
GENERAL MANAGER J           PARTS MANAGER J
CLAIMS PERSONNEL J          SERVICE MANAGER J
IMPORTANT - All Service Personnel Should Read and Initial


                                                            SERVICE BULLETIN

 APPLICABILITY:                            Legacy, Forester and Impreza                                 NUMBER:             17-06-01
      SUBJECT:                             Seat Belt Latch Slides to the                                  DATE:             11/01/01
                                           Lower Seat Belt Anchor

DESCRIPTION

In the event you encounter a customer complaint of the seat belt latch sliding down the webbing
to the lower seat belt anchor, it may be caused by the latch web stop button separating from the
belt webbing. This stop button may become loose and fall off if the belt webbing is jammed
between the body panel and door when the door is closed.

Use the chart below to locate and order the correct repair kit for your application.

                          Button Kit                        Belt Manufacturer           Vehicle Model
                         64789FC000                               NSK                  Legacy 95~01MY
                                                                                      Impreza 93~01MY
                                                                                      Forester 98~02MY
                      64780AC500VB                               Takata                Legacy 02~03MY
                                                                                      Impreza 02~03MY

REPAIR PROCEDURES

       1) Inspect the belt webbing for damage. If damaged replace the seat belt assembly.
       2) Remove any piece of broken stopper button from the belt webbing.
       3) Lift the belt latch up and beyond the original stopper button location and hold in place
          using adhesive tape.
       4) Locate the original stopper hole (about 500mm up from bottom anchor) in the webbing
          and insert the new male stopper button from the backside of the belt. Push the other part
          of the button over the pin sticking through the front belt webbing.
       5) Using a suitable tool, crimp the two parts together until the new button thickness
          is 4.5~5.0mm.
       6) Remove the adhesive tape from the latch and confirm the stopper button holds the latch
          in the proper position.


                             C A U T I O N: VEHICLE SERVICING PERFORMED BY UNTRAINED PERSONS COULD
                                     RESULT IN SERIOUS INJURY TO THOSE PERSONS OR TO OTHERS.

                     Subaru Service Bulletins are intended for use by professional technicians ONLY. They are written to inform those
                     technicians of conditions that may occur in some vehicles, or to provide information that could assist in the proper
                     servicing of the vehicle. Properly trained technicians have the equipment, tools, safety instructions, and know-how to
                     do the job correctly and safely. If a condition is described, DO NOT assume that this Service Bulletin applies to your
                     vehicle, or that your vehicle will have that condition.
Number: 17-06-01; Date 11/01/2001                                                      Page 2


  Item Description/Fail Code        Operation Number   Labor Description    Flat Rate Time
  Front seat belt stopper              A913-722           Front seat belt    One or Both
  button YEF-01, 02, 05, 08                            stopper button R&R     sides 0.2
◦ Jabse Service Manual Search 2026 ◦ Jabse Pravopis ◦ onTap.bg ◦ Other service manual resources online : Fixya ◦ eServiceinfo