Service Manuals, User Guides, Schematic Diagrams or docs for : . Car Manuals Subaru Legacy 1995-1999 Approved Subaru Legacy 1997 1997 Service Manual BODY SECTION BODY AND EXTERIOR MSA5TCD97L3787
<< Back | HomeMost service manuals and schematics are PDF files, so You will need Adobre Acrobat Reader to view : Acrobat Download Some of the files are DjVu format. Readers and resources available here : DjVu Resources
For the compressed files, most common are zip and rar. Please, extract files with Your favorite compression software ( WinZip, WinRAR ... ) before viewing. If a document has multiple parts, You should download all, before extracting.
Good luck. Repair on Your own risk. Make sure You know what You are doing.
Image preview - the first page of the document
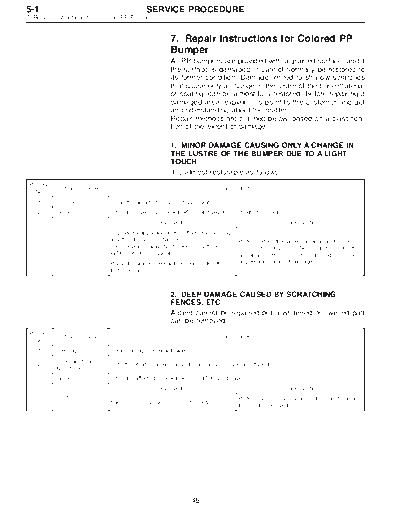
>> Download MSA5TCD97L3787 documenatation <<
Text preview - extract from the document
5-1                                         SERVICE PROCEDURE
7. Repair Instructions for Colored PP Bumper


                                                       7. Repair Instructions for Colored PP
                                                       Bumper
                                                       All PP bumpers are provided with a grained surface, and if
                                                       the surface is damaged, it cannot normally be restored to
                                                       its former condition. Damage limited to shallow scratches
                                                       that cause only a change in the lustre of the base material
                                                       or coating, can be almost fully restored. Before repairing a
                                                       damaged area, explain this point to the customer and get
                                                       an understanding about the matter.
                                                       Repair methods are outlined below, based on a classifica-
                                                       tion of the extent of damage.

                                                       1. MINOR DAMAGE CAUSING ONLY A CHANGE IN
                                                       THE LUSTRE OF THE BUMPER DUE TO A LIGHT
                                                       TOUCH
                                                       It is almost restorable as follows:
 Process
              Process name                                                  Job contents
   No.
    1      Cleaning          Clean the area to be repaired using water.
    2      Sanding           Grind the repairing area with #500 sand paper in a "feathering" motion.
                                                Resin section                                          Coated section
                             Repeatedly apply wax to the affected area using
                             a soft cloth (such as flannel).                        Perform either the same operation as for the
    3      Finish            Recommended wax: NITTO KASEI Soft 99 TIRE              resin section or process No. 18 and subsequent
                             WAX BLACK, or equivalent.                              operations in the "3." section, depending on the
                             Polish the waxed area with a clean cloth after 5       degree and nature of damage.
                             to 10 minutes.


                                                       2. DEEP DAMAGE CAUSED BY SCRATCHING
                                                       FENCES, ETC.
                                                       A dent cannot be repaired but a whitened or swelled part
                                                       can be removed.
 Process
              Process name                                                  Job contents
   No.
    1      Cleaning          Clean damaged area with water.
           Removal of dam-
    2                        Cut off protruding area, if any, due to collision, using a putty knife.
           aged area
    3      Sanding           Grind the affected area with #100 to #500 sand paper.
                                                Resin section                                          Coated section
    4      Finish                                                                   Perform process No. 12 and subsequent opera-
                             Same as process No. 3 in the "1." section.
                                                                                    tions in the "3." section.


                                                                46
                                               SERVICE PROCEDURE                                                                   5-1
                                                                                     7. Repair Instructions for Colored PP Bumper


                                                         3. DEEP DAMAGE SUCH AS A BREAK OR HOLE
                                                         THAT REQUIRES FILLING
                                                         Much of the peripheral grained surface must be sacrificed
                                                         for repair, and the degree of restoration is not really worth
                                                         the expense. (The surface, however, will become almost
                                                         flush with adjacent areas.)
                                                         Recommended repair kit: PP Part Repair Kit (NRM)
Process
             Process name                                                     Job contents
  No.
  1       Bumper removal        Remove bumper as required.
  2       Parts removal         Remove parts built into bumper as required.


                                Place bumper on a paint work table as required.
  3       Bumper placement      It is recommended that contour of work table
                                accommodates internal shape of bumper.


                                                                                                                            G5M0164

                                Remove dust, oil, etc. from areas to be repaired and surrounding areas, using a suitable solvent
  4       Surface preparation
                                (NRM No. 900 precleno, white gasoline, or alcohol).


                                If nature of damage are cracks or holes, cut a
                                guide slit of 20 to 30 mm (0.79 to 1.18 in) in
  5       Cutting               length along the crack or hole up to the bumper's
                                base surface. Then, bevel or "vee-out" the
                                affected area using a knife or grinder.


                                                                                                                            G5M0165

  6       Sanding (I)           Grind beveled surface with sand paper (#40 to #60) to smooth finish.
  7       Cleaning              Clean the sanded surface with the same solvent as used in process No. 4.
                                Grind the side just opposite the beveled area with sand paper (#40 to #60) and clean using a sol-
                                vent.
                                Temporarily spot-weld the side, using a PP welding rod and heater gun.


  8       Temporary welding


                                                                                                                            G5M0166

                                NOTE:
◦ Jabse Service Manual Search 2026 ◦ Jabse Pravopis ◦ onTap.bg ◦ Other service manual resources online : Fixya ◦ eServiceinfo