Service Manuals, User Guides, Schematic Diagrams or docs for : . Car Manuals Subaru Legacy 1995-1999 Approved Subaru Legacy 1999 1999 Service Manual ENGINE SECTION EMISSION CONTROL SYSTEM AND VACUUM FITTING MSA5TCD99L10
<< Back | HomeMost service manuals and schematics are PDF files, so You will need Adobre Acrobat Reader to view : Acrobat Download Some of the files are DjVu format. Readers and resources available here : DjVu Resources
For the compressed files, most common are zip and rar. Please, extract files with Your favorite compression software ( WinZip, WinRAR ... ) before viewing. If a document has multiple parts, You should download all, before extracting.
Good luck. Repair on Your own risk. Make sure You know what You are doing.
Image preview - the first page of the document
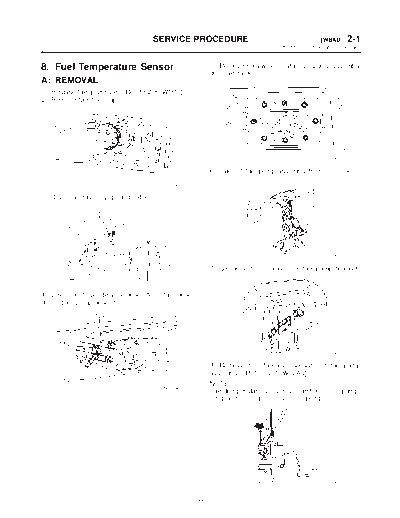
>> Download MSA5TCD99L10 documenatation <<
Text preview - extract from the document
                                      SERVICE PROCEDURE                                     [W8A0] 2-1
                                                                                8. Fuel Temperature Sensor


8. Fuel Temperature Sensor                               5) Remove nuts which install fuel pump assembly
                                                         onto fuel tank.
A: REMOVAL
1) Release fuel pressure.
2) Remove fuel filler cap.


                                                                                                B2M0955

                                                         6) Take off fuel pump assembly from fuel tank.

                                        B2M1746

3) Disconnect battery ground cable.


                                                                                                B2M0956

                                                         7) Disconnect connector from fuel pump bracket.

                                        B2M1723

4) Disconnect fuel delivery hose (A), return hose
(B) and jet pump hose (C).


                                                                                                S2M0145

                                                         8) Remove main fuel level sensor from fuel pump
                                                         assembly.
                                                         NOTE:
                                       B2M0954E
                                                         Fuel temperature sensor is a unit with fuel pump.
                                                         If replacing it, replace as a fuel pump.


                                                                                                S2M0855


                                                    11
2-1   [W8B0]                          SERVICE PROCEDURE
9. Fuel Tank Pressure Sensor


B: INSTALLATION                                             9. Fuel Tank Pressure Sensor
CAUTION:                                                    A: REMOVAL AND INSTALLATION
Leave fuel filler cap open when tightening nuts,
to prevent fuel from flowing out through fuel               1) Release fuel pressure.
delivery and return pipes. Close fuel filler cap            2) Open fuel flap lid, and remove fuel filler cap.
after tightening nuts.
Installation is in the reverse order of removal. Do
the following:
(1) Always use new gaskets.
(2) Ensure sealing portion is free from fuel or for-
eign particles before installation.
(3) Tighten nuts in alphabetical sequence shown
in figure to specified torque.
Tightening torque:
    4.4
◦ Jabse Service Manual Search 2026 ◦ Jabse Pravopis ◦ onTap.bg ◦ Other service manual resources online : Fixya ◦ eServiceinfo