Service Manuals, User Guides, Schematic Diagrams or docs for : . Car Manuals Toyota Camry 1994.2002-2007 Approved Toyota Camry 2007 Hybrid 50 bodypane quarterp
<< Back | HomeMost service manuals and schematics are PDF files, so You will need Adobre Acrobat Reader to view : Acrobat Download Some of the files are DjVu format. Readers and resources available here : DjVu Resources
For the compressed files, most common are zip and rar. Please, extract files with Your favorite compression software ( WinZip, WinRAR ... ) before viewing. If a document has multiple parts, You should download all, before extracting.
Good luck. Repair on Your own risk. Make sure You know what You are doing.
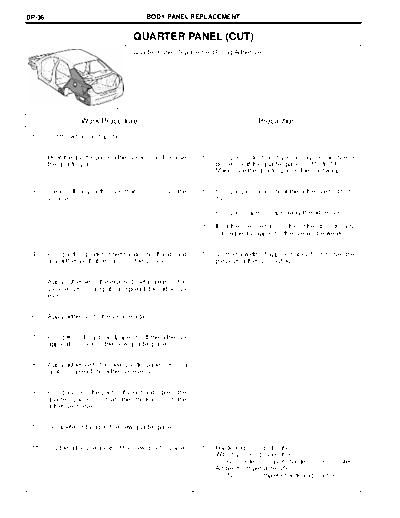
Image preview - the first page of the document
>> Download quarterp documenatation <<
Text preview - extract from the document
BP-36                                       BODY PANEL REPLACEMENT


                                       QUARTER PANEL (CUT)
                                       Quarter Panel Replacement Using Adhesive


                             F25735A


                    Work Procedure                                                Precaution
 1      Cut the wheel arch portion.


 2      Heat the quarter panel adhesive area and remove       (1)   Using an industrial dryer or oxygen acetylene
        the quarter panel.                                          burner, heat the quarter panel to 110 to 140_C.
                                                                    Make sure the quarter panel does not warp.


 3      Clean off any adhesive that remains on the            (1)   Using a gas burner, heat the adhesive to 110 to
        vehicle.                                                    140_C.

                                                              (2)   Using a scraper, scrape away the adhesive.

                                                              (3)   If adhesive remains, the strength of any
                                                                    subsequently applied adhesive will be weak.


 4      Using a disc grinder or belt sander, scuff and sand   (1)   Scuff at a width of approximately 10 mm over the
        any adhesive that remains on the vehicle.                   previous adhesive coating.


 5      Apply adhesive to the exposed metal areas on the
        vehicle. Using a spatula, spread the adhesive
        evenly.


 6      Apply adhesive to the vehicle again.


 7      Using #60-240 grit sandpaper, scuff the adhesive
        application area on the new quarter panel.


 8      Apply adhesive to the new quarter panel. Using a
        spatula, spread the adhesive evenly.


 9      Using a vise or the palms of your hands, press the
        quarter panel so that the thickness of the
        adhesive is even.


 10     Complete installation the new quarter panel.


 11     Dry the adhesive areas of the new quarter panel.      (1)   Hardening Time Estimation
                                                                    With dryer or equivalent (60_C)
                                                                      : 60 minutes (complete hardening: 90 minutes)
                                                                    Ambient temperature (25_C)
                                                                      : 12 hours (complete hardening: 24 hours)
                                       BODY PANEL REPLACEMENT                                               BP-37


  Symbol meaning                       : Cut with disc sander, etc.   : Cut Location for Supply Parts
            : Remove Weld Points       : Cut and Join Location        : Braze

                                                                                                             F25735B

REMOVAL


                Urethane Foam


                        85
                      (3.35)


                                                                                        260
                                                                                      (10.24)


                                                                                                        mm (in.)
                                                                                                              F25735

REMOVAL POINT
1  *1 in illustration above indicates where the adhesive is.
2  Roughly cut open the wheel arch of the panel so that the adhesive can be reached. Cut through the adhesive
   with a cut chisel to remove the panel.
   HINT:
   1) If the cut chisel cannot reach the adhesive, heat the adhesive with a heat gun, oxygen-acetylene burner.
         When heating, do not deform the quarter housing outer panel.
BP-38                             BODY PANEL REPLACEMENT


   Symbol meaning
                                  : Cut with disc sander, etc.   : Cut Location for Supply Parts
           : Remove Weld Points   : Cut and Join Location        : Braze

                                                                                                   F25735B


                                                                                                    F25736
                                         BODY PANEL REPLACEMENT                                                BP-39


   Symbol meaning

       : Spot Weld            : MIG Plug Weld        : Butt Weld       : Body Sealer        : Braze

                                                                                                               F25737B

INSTALLATION


            Urethane Foam


                                         Fuel Filler Opening Lid


                                                       Water Proof Rivets       3                       Spot Tip
                                                                              (0.12)


                                                                                     5
                                                                                   (0.24)


                                                                                                          mm (in.)
                                                                                                                F26012

INSTALLATION POINT
1   Inspect the fitting of the related parts around the new parts before welding. This affects the appearance of the
    finish.
2   Temporarily install the new parts and measure each part of the new parts in accordance with the body
    dimension diagram. (See the body dimension diagram)
3   Apply adhesive(3MTM AutomixTM Panel Bonding Adhesive #8115) to the area indicated by *1 in illustration.
    HINT:
    1) Apply enough adhesive for the panels to sick to each other.
4   Perform spot-welding on the flange indicated by *2 in the illustration. Modify/ cut the spot tip as shown in the
    illustration (*3) so that it can fit in to the narrow flange.
5   Before installing a new part, apply body sealer.
    HINT:
    1) Apply sealer in ana even, continuous bead.
BP-40                                     BODY PANEL REPLACEMENT


    Symbol meaning

        : Spot Weld            : MIG Plug Weld        : Butt Weld       : Body Sealer        : Braze

                                                                                                                 F25737B


                                                                                                                  F25738

 INSTALLATION POINT
 1   Inspect the fitting of the related parts around the new parts before welding. This affects the appearance of the
     finish.
 2   Temporarily install the new parts and measure each part of the new parts in accordance with the body
     dimension diagram. (See the body dimension diagram)
 3   After welding, apply the polyurethane foam to the corresponding parts. (See the paint.coating)
 4   After welding, apply body sealer and undercoating to the corresponding parts. (See the paint.coating)
 5   After applying the top coat, apply anti-rust agent to the internal panel portion of the closed section structural
     weld points.
◦ Jabse Service Manual Search 2026 ◦ Jabse Pravopis ◦ onTap.bg ◦ Other service manual resources online : Fixya ◦ eServiceinfo