Service Manuals, User Guides, Schematic Diagrams or docs for : . Car Manuals Toyota Celica 1988-1989.1993-1994.2000 Approved Toyota Celica 1994 D adjustments
<< Back | HomeMost service manuals and schematics are PDF files, so You will need Adobre Acrobat Reader to view : Acrobat Download Some of the files are DjVu format. Readers and resources available here : DjVu Resources
For the compressed files, most common are zip and rar. Please, extract files with Your favorite compression software ( WinZip, WinRAR ... ) before viewing. If a document has multiple parts, You should download all, before extracting.
Good luck. Repair on Your own risk. Make sure You know what You are doing.
Image preview - the first page of the document
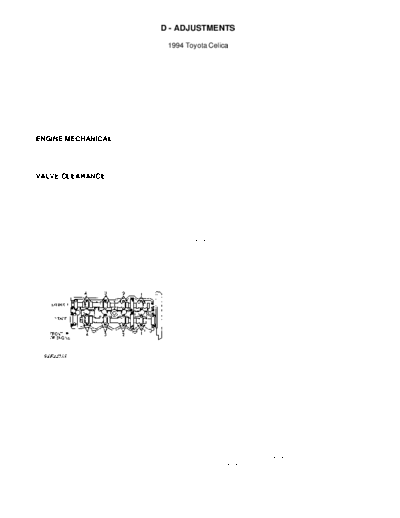
>> Download D adjustments documenatation <<
Text preview - extract from the document
                                    D - ADJUSTMENTS

                                         1994 Toyota Celica


         1994 ENGINE PERFORMANCE
         Toyota On-Vehicle Adjustments

         Celica

    ENGINE MECHANICAL
         Before performing any on-vehicle adjustments to fuel or
ignition systems, ensure engine mechanical condition is okay.

    VALVE CLEARANCE
NOTE:   Adjust valve clearance with engine cold.

NOTE:   If valve cover uses grommets below retaining nuts or bolts,
        keep grommets in order so they are installed in original
        locations during reassembly.

         Celica 2.2L
         1) Remove valve cover(s) and gasket(s). Rotate crankshaft so
timing mark on crankshaft pulley aligns with "0" mark on front cover
and cylinder No. 1 (front cylinder at timing belt or timing chain end)
is at TDC on compression stroke.
         2) Ensure valves on cylinder No. 1 are closed. If valves are
not closed, rotate crankshaft 360 degrees (one full revolution). With
cylinder No. 1 at TDC, check valve clearance on specified valves. See
VALVE CLEARANCE ADJUSTMENT SEQUENCE table. See Fig. 1.


Fig. 1: Typical 4-Cylinder Valve Arrangement
Courtesy of Toyota Motor Sales, U.S.A., Inc.

         3) Using feeler gauge, measure and record valve clearance
between valve lifter and camshaft. Ensure valve clearance is within
specification. See VALVE CLEARANCE SPECIFICATIONS table.
         4) To check remaining valves, rotate crankshaft 360 degrees
(one full revolution) until cylinder No. 4 is at TDC on compression
stroke. Measure valve clearance on specified valves. See VALVE
CLEARANCE ADJUSTMENT SEQUENCE table.
         5) If valve clearance requires adjustment, rotate crankshaft
so camshaft lobe on valve to be adjusted is facing upward, away from
valve lifter. Rotate valve lifter so notch on valve lifter is toward
spark plug.
         6) Valve Clearance Adjuster (SST 09248-55040) is used for
adjusting valve clearance. Press valve lifter downward using SST "A"
of valve clearance adjuster. See Fig. 2. Install SST "B" between
camshaft and valve lifter. Remove SST "A".
         7) Using small screwdriver and magnet, remove adjusting shim.
Using micrometer, measure thickness of adjusting shim removed. Using
measured clearance and adjusting shim thickness, determine correct
thickness of adjusting shim to be used. See SHIM THICKNESS table.
Install adjusting shim. Recheck valve clearance.

NOTE:   Before installing valve cover gasket, apply sealant at
        camshaft bearing caps-to-cylinder head surfaces where valve
        cover gasket seals.

         8) Install valve cover using NEW gasket. On Previa, remove
bolt from accessory drive shaft. On all models, reverse removal
procedure to install remaining components.


Fig. 2: Removing & Installing Valve Clearance Adjusting Shim
Courtesy of Toyota Motor Sales, U.S.A., Inc.

         Celica 1.8L
         1) Remove valve cover and gasket. Rotate crankshaft so timing
mark on crankshaft pulley aligns with "0" mark on front cover and
cylinder No. 1 (front cylinder at timing belt end) is at TDC on
compression stroke.
         2) Ensure valves on cylinder No. 1 are closed. If valves are
not closed, rotate crankshaft 360 degrees (one full revolution). With
cylinder No. 1 at TDC, check valve clearance on specified valves. See
VALVE CLEARANCE ADJUSTMENT SEQUENCE table. See Fig. 1.
         3) Using feeler gauge, measure and record valve clearance
between valve lifter and camshaft. Ensure valve clearance is within
specification. See VALVE CLEARANCE SPECIFICATIONS table.
         4) To check remaining valves, rotate crankshaft 360 degrees
(one full revolution) until cylinder No. 4 is at TDC on compression
stroke. Measure valve clearance on specified valves. See VALVE
CLEARANCE ADJUSTMENT SEQUENCE table.
         5) If valve clearance on intake valve requires adjustment,
manufacturer states to remove intake camshaft for access to adjusting
shim. See appropriate article listed below:

                 1.8L 4-CYL VIN [A]
                 2.2L 4-CYL - VIN [S]

         6) If valve clearance on exhaust valve requires adjustment,
rotate crankshaft so camshaft lobe on valve to be adjusted is facing
upward, away from valve lifter. Rotate valve lifter so notch on valve
lifter is toward front of vehicle.
         7) Valve Clearance Adjuster (SST 09248-55040) is used for
adjusting valve clearance. Press valve lifter downward using SST "A"
of valve clearance adjuster. See Fig. 2. Install SST "B" between
camshaft and valve lifter. Remove SST "A".
         8) On all valve applications, using small screwdriver and
magnet, remove adjusting shim. Using micrometer, measure thickness of
adjusting shim removed. Using measured clearance and adjusting shim
thickness, determine correct thickness of adjusting shim to be used.
See SHIM THICKNESS table. Shim thickness can also be determined by
using the following formula: N = T + A.

           *     N = Thickness of adjuster shim required.
           *     T = Thickness of adjuster shim removed.
           *     A = Measured clearance minus valve clearance specification.

NOTE:            Before installing valve cover gasket, apply sealant at
                 camshaft bearing caps-to-cylinder head surfaces where valve
                 cover gasket seals.

         9) Install adjusting shim. Recheck valve clearance. Install
valve cover using NEW gasket. To install remaining components, reverse
removal procedure.

VALVE CLEARANCE ADJUSTMENT SEQUENCE TABLE
◦ Jabse Service Manual Search 2026 ◦ Jabse Pravopis ◦ onTap.bg ◦ Other service manual resources online : Fixya ◦ eServiceinfo