Service Manuals, User Guides, Schematic Diagrams or docs for : . Car Manuals Toyota Celica 1988-1989.1993-1994.2000 Approved Toyota Celica 2000 Toyota Celica 2000 Service Manual Technical Service Bulletins TSB_Shoulder_belt_appearance_fix
<< Back | HomeMost service manuals and schematics are PDF files, so You will need Adobre Acrobat Reader to view : Acrobat Download Some of the files are DjVu format. Readers and resources available here : DjVu Resources
For the compressed files, most common are zip and rar. Please, extract files with Your favorite compression software ( WinZip, WinRAR ... ) before viewing. If a document has multiple parts, You should download all, before extracting.
Good luck. Repair on Your own risk. Make sure You know what You are doing.
Image preview - the first page of the document
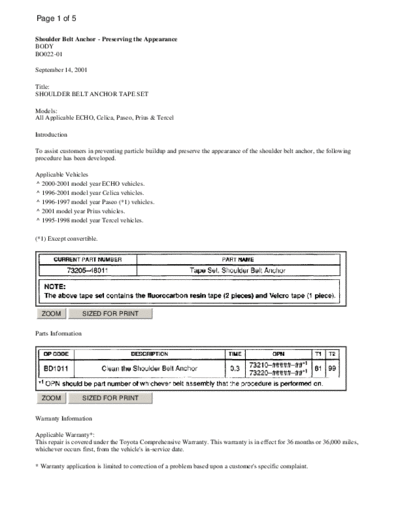
>> Download TSB_Shoulder_belt_appearance_fix documenatation <<
Text preview - extract from the document
Page 1 of 5

Shoulder Belt Anchor - Preserving the Appearance
BODY
BO022 -01

September 14, 2001

Title:
SHOULDER BELT ANCHOR TAPE SET

Models:
All Applicable ECHO, Celica, Paseo, Prius & Tercel

Introduction

To assist customers in preventing particle buildup and preserve the appearance of the shoulder belt anchor, the following
procedure has been developed.

Applicable Vehicles
^ 2000-2001 model year ECHO vehicles.
^ 1996-2001 model year Celica vehicles.
^ 1996-1997 model year Paseo (*1) vehicles.
^ 2001 model year Prius vehicles.
^ 1995-1998 model year Tercel vehicles.

(*1) Except convertible.


  ZOOM              SIZED FOR PRINT


Parts Information


  ZOOM              SIZED FOR PRINT


Warranty Information

Applicable Warranty*:
This repair is covered under the Toyota Comprehensive Warranty. This warranty is in effect for 36 months or 36,000 miles,
whichever occurs first, from the vehicle's in-service date.

* Warranty application is limited to correction of a problem based upon a customer's specific complaint.
Page 2 of 5

Installation Procedure

1. CLEAN SHOULDER BELT ANCHOR
NOTE:
^ Do not install the tape when the vehicle temperature is below the freezing point.
^ Do not re -use removed fluorocarbon resin tape.


  ZOOM            SIZED FOR PRINT


A. Pull out the seat belt about 300 mm and attach a clip as shown in the illustration.
HINT: Preventing the seat belt from retraction with a clip will make the following work easier.


  ZOOM            SIZED FOR PRINT


B. Put the Velcro tape (in the parts kit) through the hole of the shoulder belt anchor, brush-shaped side to the anchor.
Page 3 of 5


  ZOOM            SIZED FOR PRINT


C. Pull both ends of the Velcro tape with your hand and shave off the dint on the shoulder belt anchor by moving the Velcro
   tape several times as shown in the illustration.
NOTE: Remove the dirt completely. Otherwise, the fluorocarbon resin tape may not adhere properly.

2. INSTALL FLUOROCARBON RESIN TAPE


  ZOOM            SIZED FOR PRINT


 A. Place the fluorocarbon resin tape onto the seat belt as shown in the illustration.
NOTE: Before installation of the fluorocarbon resin tape, it is necessary to pre -release the colored film about 5 mm for each
side. (Not fully released.)


  ZOOM            SIZED FOR PRINT


B. By pulling up the seat belt, put the fluorocarbon resin tape through the hole of the shoulder belt anchor. Match the
   shoulder belt anchor to the center of the tape.
Page 4 of 5


  ZOOM            SIZED FOR PRINT


C. Remove the upper side colored film from the fluorocarbon resin tape, and securely affix the tape to the outside of the
   shoulder belt anchor.


  ZOOM            SIZED FOR PRINT


D. Remove the lower side colored film from the fluorocarbon resin tape, and securely affix the tape to the outside of the
   shoulder belt anchor.
NOTE:
^ Be sure to affix the fluorocarbon tape securely along all edges.
^ Pay attention not to make any wrinkles or slack in the fluorocarbon resin tape.

   E. Remove the clip.
Page 5 of 5


  ZOOM            SIZED FOR PRINT


F. By pulling the seat belt up and down several times, as shown in the illustration, securely affix the fluorocarbon resin tape
   and confirm the smoothness of the belt movement.
NOTE: Affix the fluorocarbon resin tape on the shoulder belt anchor to the other side following the same procedure.

NOTE: If the seat belt requires cleaning to remove dirt, only use a neutral detergent or lukewarm water to clean. Use the seat
belt after it is completely dried, to confirm proper operation.
◦ Jabse Service Manual Search 2026 ◦ Jabse Pravopis ◦ onTap.bg ◦ Other service manual resources online : Fixya ◦ eServiceinfo