Service Manuals, User Guides, Schematic Diagrams or docs for : . Car Manuals Toyota Sienna 1998-2003 Approved FSM 05 eg cip0441p
<< Back | HomeMost service manuals and schematics are PDF files, so You will need Adobre Acrobat Reader to view : Acrobat Download Some of the files are DjVu format. Readers and resources available here : DjVu Resources
For the compressed files, most common are zip and rar. Please, extract files with Your favorite compression software ( WinZip, WinRAR ... ) before viewing. If a document has multiple parts, You should download all, before extracting.
Good luck. Repair on Your own risk. Make sure You know what You are doing.
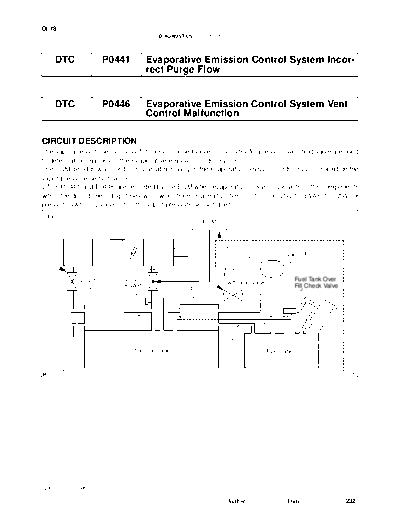
Image preview - the first page of the document
>> Download cip0441p documenatation <<
Text preview - extract from the document
DI-78
DIAGNOSTICS - ENGINE
DI6E7-02
DTC P0441 Evaporative Emission Control System Incor-
rect Purge Flow
DTC P0446 Evaporative Emission Control System Vent
Control Malfunction
CIRCUIT DESCRIPTION
The vapor pressure sensor, VSV for canister closed valve (CCV), VSV for pressure switching valve are used
to detect abnormalities in the evaporative emission control system.
The ECM decides whether there is an abnormality in the evaporative emission control system based on the
vapor pressure sensor signal.
DTCs P0441 and P0446 are recorded by the ECM when evaporative emissions leak from the components
within the dotted line in Fig. 1 below, or when there is a malfunction in either the VSV for EVAP, the VSV for
pressure switching valve, or in the vapor pressure sensor itself.
Fig. 1
ECM
Vapor Pressure
Sensor
VSV for
(6) Pressure
VSV for VSV for Fuel Tank Over
Switching Valve
CCV EVAP (1) Fill Check Valve
(4)
(5) (10)
(7) (2)
(8) (11)
(9)
(3)
Charcoal Canister Fuel Tank
A10142
2001 SIENNA (RM787U)
Author : Date : 232
DI-79
DIAGNOSTICS - ENGINE
DTC No. DTC Detecting Condition Trouble Area
S Vacuum hose cracks, holed blocked, damaged or discon-
Pressure in charcoal canister and fuel tank does not drop dur-
P0441 nected ((1), (2), (3), (4), (5), (6), (7), (8), (9), (10) and (11) in
ing purge control (2 trip detection logic)
Fig. 1)
S F l tank cap incorrectly installed
Fuel k i l i ll d
When VSV for pressure switching valve is ON, ECM judges S Fuel tank cap cracked or damaged
that there is no continuity between vapor pressure sensor, fuel S Open or short in vapor pressure sensor circuit
tank and charcoal canister (2 trip detection logic) S Vapor pressure sensor
S O en or short in VSV circuit for EVAP
Open
S VSV for EVAP
When VSV for pressure switching valve is turned OFF, pres- S Open or short in VSV circuit for CCV
P0446 sure in fuel tank is maintained at atmospheric pressure (2 trip S VSV for CCV
detection logic) S Open or short in VSV circuit for pressure switching valve
S VSV for pressure switching valve
When VSV for CCV is ON, pressure in charcoal canister and S Fuel tank cracked, holed or damaged
fuel tank is maintained at atmospheric pressure (2 trip detec- S Charcoal canister cracked, holed or damaged
S Fuel tank over fill check valve cracked damaged
tion logic)
S ECM
WIRING DIAGRAM
Refer to DTC P0440 on page DI-72 .
INSPECTION PROCEDURE
HINT:
S If DTC P0441, P0446, P0450 or P0451 is output after DTC P0440 first troubleshoot DTC P0441,
P0446, P0450 or P0451. If no malfunction is detected, troubleshoot DTC P0440 next.
S Read freeze frame data using TOYOTA hand-held tester or OBD II scan tool. Because freeze frame
records the engine conditions when the malfunction is detected. When troubleshooting, it is useful for
determining whether the vehicle was running or stopped, the engine was warmed up or not, the air-fuel
ratio was lean or rich, etc. at the time of the malfunction.
S When the ENGINE RUN TIME in the freeze frame data is less than 200 seconds, carefully check the
vapor pressure sensor.
TOYOTA hand-held tester:
1 Check whether hose close to fuel tank have been modified, and check whether
there are signs of any accident near fuel tank or charcoal canister (See page
DI-72 ).
NG Repair or replace.
OK
2 Check that fuel tank cap is TOYOTA genuine parts (See page DI-72 ).
NG Replace to TOYOTA genuine parts.
2001 SIENNA (RM787U)
Author : Date : 233
DI-80
DIAGNOSTICS - ENGINE
OK
3 Check that fuel tank cap is correctly installed (See page DI-72 ).
NG Correctly install fuel tank cap.
OK
4 Check fuel tank cap (See page DI-72 ).
NG Replace fuel tank cap.
OK
5 Check filler neck for damage (See page DI-72 ).
NG Replace filler pipe.
OK
6 Check vacuum hoses between vapor pressure sensor and fuel tank, charcoal
canister and VSV for pressure switching valve, and VSV for pressure switching
valve and charcoal canister (See page DI-72 ).
NG Repair or connect VSV or sensor connector.
OK
7 Check hose and tube between fuel tank and charcoal canister
(See page DI-72 ).
2001 SIENNA (RM787U)
Author : Date : 234
DI-81
DIAGNOSTICS - ENGINE
NG Repair or replace.
OK
8 Check VSV connector for EVAP, VSV connector for CCV, VSV connector for pres-
sure switching valve and vapor pressure sensor connector for looseness and
disconnection.
NG Repair or connect VSV or sensor connector.
OK
9 Check vacuum hoses ((8), (9), (10) and (11) in Fig. 1 in circuit description).
CHECK:
(a) Check that the vacuum hose is connected correctly.
(b) Check the vacuum hose for looseness and disconnection.
(c) Check the vacuum hose for cracks, hole, damage and blockage.
NG Repair or replace.
OK
10 Check voltage between terminals VC and E2 of ECM connector (See page
DI-72 ).
NG Check and replace ECM (See page IN-31 ).
OK
11 Check voltage between terminals PTNK and E2 of ECM connectors (See page
DI-72 ).
OK Go to step 13.
2001 SIENNA (RM787U)
Author : Date : 235
DI-82
DIAGNOSTICS - ENGINE
NG
12 Check for open and short in harness and connector between vapor pressure
sensor and ECM (See page IN-31 ).
NG Repair or replace harness or connector.
OK
Replace vapor pressure sensor.
13 Check purge flow.
PREPARATION:
VSV is ON (a) Connect the TOYOTA hand-held tester to the DLC3.
(b) Select the ACTIVE TEST mode on the TOYOTA hand-
held tester.
(c) Disconnect the vacuum hose for the VSV for the EVAP
from the charcoal canister.
(d) Start the engine.
CHECK:
When the VSV for the EVAP is operated by the TOYOTA hand-
held tester, check whether the disconnected hose applies suc-
VSV is OFF
tion to your finger.
OK:
VSV is ON:
Disconnected hose applies suction to your finger.
VSV is OFF:
Disconnected hose applies no suction to your finger.
OK Go to step 17.
A00230
NG
14 Check vacuum hose between intake manifold and VSV for EVAP, and VSV for
EVAP and charcoal canister.
CHECK:
(a) Check that the vacuum hose is connected correctly.
(b) Check the vacuum hose for looseness and disconnection.
2001 SIENNA (RM787U)
Author : Date : 236
DI-83
DIAGNOSTICS - ENGINE
(c) Check the vacuum hose for cracks, hole, damage and blockage.
NG Repair or replace.
OK
15 Check operation of VSV for EVAP (See page SF-68 ).
OK Go to step 16.
NG
Replace VSV and charcoal canister, and then clean vacuum hoses between throttle body and
VSV for EVAP, and VSV for EVAP and charcoal canister.
16 Check for open and short in harness and connector between EFI main relay
(Marking: EFI) and VSV for EVAP, and VSV for EVAP and ECM (See page
IN-31 ).
NG Repair or replace harness or connector.
OK
Check and replace ECM (See page IN-31 ).
17 Check VSV for CCV.
PREPARATION:
ON (a) Connect the TOYOTA hand-held tester to the DLC3.
Air Air (b) Disconnect the vacuum hose for the VSV for the CCV
E E
from the charcoal canister.
(c) Turn the ignition switch ON and push the TOYOTA hand-
held tester main switch ON.
F F
(d) Select the ACTIVE TEST mode on the TOYOTA hand-
BE6653 held tester.
A10149 VSV is ON VSV is OFF
A10150 A10281 CHECK:
Check the VSV operation when it is operated by the TOYOTA
hand-held tester.
2001 SIENNA (RM787U)
Author : Date : 237
DI-84
DIAGNOSTICS - ENGINE
OK:
VSV is ON:
Air does not flow from port E to port F.
VSV is OFF:
Air from port E flows out through port F.
OK Go to step 21.
NG
18 Check vacuum hose between VSV for CCV and charcoal canister.
CHECK:
(a) Check that the vacuum hose is connected correctly.
(b) Check the vacuum hose for looseness and disconnection.
(c) Check the vacuum hose for cracks, hole damage and blockage.
NG Repair or replace.
OK
19 Check operation of VSV for CCV (See page SF-73 ).
OK Go to step 20.
NG
Replace VSV and charcoal canister, and then clean vacuum hose between charcoal canister and
VSV for CCV.
20 Check for open and short in harness and connector between EFI main relay
(Marking: EFI) and VSV for CCV, and VSV for CCV and ECM (See page IN-31 ).
NG Repair or replace harness or connector.
OK
2001 SIENNA (RM787U)
Author : Date : 238
DI-85
DIAGNOSTICS - ENGINE
Check and replace ECM (See page IN-31 ).
21 Check VSV for pressure switching valve.
ON PREPARATION:
(a) Connect the TOYOTA hand-held tester to the DLC3.
(b) Turn the ignition switch ON and push the TOYOTA hand-
VSV is ON VSV is OFF
held tester main switch ON.
(c) Select the ACTIVE TEST mode on the TOYOTA hand-
held tester.
E E CHECK:
F F
BE6653
Check the VSV operation when it is operated by the TOYOTA
A10607
A10606
Air Air A10628 hand-held tester.
OK:
VSV is ON:
Air from port E flows out through port F.
VSV is OFF:
Air does not flow from port E to port F.
OK Go to step 24.
NG
22 Check operation of VSV for pressure switching valve (See page SF-75 ).
OK Go to step 23.
NG
Replace VSV and charcoal canister, and then clean vacuum hose between charcoal canister and
VSV for pressure switching valve, and VSV for pressure switching valve and fuel tank.
23 Check for open and short in harness and connector between EFI main relay
(Marking: EFI) and VSV for pressure switching valve, and VSV for pressure
switching valve and ECM (See page IN-31 ).
NG Repair or replace harness or connector.
2001 SIENNA (RM787U)
Author : Date : 239
DI-86
DIAGNOSTICS - ENGINE
OK
Check and replace ECM (See page IN-31 ).
24 Check fuel tank.
START PREPARATION:
(a) Remove the grove compartment (See page SF-83 ).
(b) Connect the TOYOTA hand-held tester to the DLC3.
ON (c) Select the ACTIVE TEST mode on the TOYOTA hand-
VSV for EVAP
OFF held tester.
VSV for CCV ON (d) Start the engine.
OFF (e) The VSV for the CCV is ON by the TOYOTA hand-held
VSV for pressure ON tester.
Switching Valve
OFF (f) The VSV for the EVAP and the VSV for the pressure
1.2 V 30 sec. Measure switching valve are ON by the TOYOTA hand-held tester
Voltage and hold the VSV for the EVAP until voltage between ter-
minals PTNK and E2 becomes 1.2 V.
CHECK:
Measure the voltage between terminals PTNK and E2 of the
ECM connectors 30 sec. after switching the VSV for the EVAP
and the VSV for the pressure switching valve from ON to OFF.
E2
(-) (+) PTNK
OK:
BE6653 Voltage:
A10620
A10574 A10622 When there is no sharp change of the voltage with the
voltage of more or less 1.2 V
NG Replace fuel tank.
OK
2001 SIENNA (RM787U)
Author : Date : 240
DI-87
DIAGNOSTICS - ENGINE
25 Check charcoal canister.
START PREPARATION:
(a) Remove the grove compartment (See page SF-83 ).
(b) Connect the TOYOTA hand-held tester to the DLC3.
VSV for EVAP ON
(c) Select the ACTIVE TEST mode on the TOYOTA hand-
OFF
held tester.
ON
VSV for CCV
(d) Start the engine.
OFF
(e) The VSV for the CCV and the VSV for the pressure
VSV for pressure ON
switching valve are ON by the TOYOTA hand-held tester.
Switching Valve
OFF (f) The VSV for the EVAP is ON by the TOYOTA hand-held
1.2 V 30 sec. Measure tester and hold the VSV for the EVAP until voltage be-
Voltage
tween terminals PTNK and E2 becomes 1.2 V.
CHECK:
Measure the voltage between terminals PTNK and E2 of the
ECM connectors 30 sec. after switching the VSV for the EVAP
from ON to OFF.
OK:
E2 Voltage:
(-) (+)
PTNK When there is no sharp change of the voltage with the
BE6653
A10621
A10574 A10623 voltage of more or less 1.2 V
NG Replace charcoal canister.
OK
26 Remove charcoal canister and check it (See page EC-6 ).
NG Replace charcoal canister.
OK
27 Check fuel tank over fill check valve (See page EC-6 ).
NG Replace fuel tank over fill check valve or fuel
tank.
OK
2001 SIENNA (RM787U)
Author : Date : 241
DI-88
DIAGNOSTICS - ENGINE
Check and replace charcoal canister (See
page EC-6 ).
OBD II scan tool (excluding TOYOTA hand-held tester):
1 Check whether hose close to fuel tank have been modified, and check whether
there are signs of any accident near fuel tank or charcoal canister (See page
DI-72 ).
NG Repair or replace.
OK
2 Check that fuel tank cap is TOYOTA genuine parts (See page DI-72 ).
NG Replace to TOYOTA genuine parts.
OK
3 Check that fuel tank cap is correctly installed (See page DI-72 ).
NG Correctly install fuel tank cap.
OK
4 Check fuel tank cap (See page DI-72 ).
NG Replace fuel tank cap.
OK
5 Check filler neck for damage (See page DI-72 ).
2001 SIENNA (RM787U)
Author : Date : 242
DI-89
DIAGNOSTICS - ENGINE
NG Replace filler pipe.
OK
6 Check vacuum hoses between vapor pressure sensor and fuel tank, charcoal
canister and VSV for pressure switching valve, and VSV for pressure switching
valve and charcoal canister (See page DI-72 ).
NG Repair or connect VSV or sensor connector.
OK
7 Check hose and tube between fuel tank and charcoal canister (See page
DI-72 ).
NG Repair or replace.
OK
8 Check VSV connector for EVAP, VSV connector for CCV, VSV connector for pres-
sure switching valve and vapor pressure sensor connector for looseness and
disconnection.
NG Repair or connect VSV or sensor connector.
OK
9 Check vacuum hoses ((8), (9) , (10) and (11) in Fig. 1 in circuit description).
CHECK:
(a) Check that the vacuum hose is connected correctly.
(b) Check the vacuum hose for looseness and disconnection.
(c) Check the vacuum hose for cracks, hole damage and blockage.
NG Repair or replace.
2001 SIENNA (RM787U)
Author : Date : 243
DI-90
DIAGNOSTICS - ENGINE
OK
10 Check voltage between terminals VC and E2 of ECM connector (See page
DI-72 ).
NG Check and replace ECM (See page IN-31 ).
OK
11 Check voltage between terminals PTNK and E2 of ECM connectors (See page
DI-72 ).
OK Go to step 13.
NG
12 Check for open and short in harness and connector between vapor pressure
sensor and ECM (See page IN-31 ).
NG Repair or replace harness or connector.
OK
Replace vapor pressure sensor.
2001 SIENNA (RM787U)
Author : Date : 244
DI-91
DIAGNOSTICS - ENGINE
13 Check VSV for EVAP.
ON PREPARATION:
(a) Remove the glove compartment (See page SF-83 ).
EVP1
(b) Turn the ignition switch ON.
CHECK:
Check the VSV function.
(1) Connect between terminal EVP1 of the ECM con-
nector and body ground (ON).
(2) Disconnect between terminal EVP1 of the ECM
ON OFF connector and body ground (OFF).
OK:
(1) VSV is ON:
Air Air Air from port E frows out through port F.
(2) VSV is OFF:
E E
Air does not flow from port E to port F.
F F
OK Go to step 16.
VSV is ON VSV is OFF
A02028
NG
14 Check operation of VSV for EVAP (See page SF-68 ).
OK Go to step 15.
NG
Replace VSV and clean vacuum hoses between throttle body and VSV for EVAP, and VSV for
EVAP and charcoal canister, and then check charcoal canister.
15 Check for open and short in harness and connector between EFI main relay
(Marking: EFI) and VSV for EVAP, and VSV for EVAP and ECM (See page IN-31 )
NG Repair or replace harness or connector.
OK
2001 SIENNA (RM787U)
Author : Date : 245
DI-92
DIAGNOSTICS - ENGINE
Check and replace ECM (See page IN-31 ).
16 Check VSV for CCV.
PREPARATION:
ON (a) Remove the grove compartment (See page SF-83 ).
CCV (b) Turn the ignition switch ON.
CHECK:
Check the VSV function.
(1) Connect between terminal CCV of the ECM con-
nector and body ground (ON).
(2) Disconnect between terminal CCV of the ECM con-
nector and body ground (OFF).
OFF ON OK:
Air VSV is ON:
Air
E E Air does not flow from port E to port F.
VSV is OFF:
Air from port E flows out through port F.
F F
A10630
BE6653
VSV is ON VSV is OFF OK Go to step 19.
A10310
A10281 A10631
NG
17 Check operation of VSV for CCV (See page SF-73 ).
OK Go to step 18.
NG
Replace VSV and charcoal canister, and then clean vacuum hose between charcoal canister and
VSV for CCV.
18 Check for open and short in harness and connector between EFI main relay
(Marking: EFI) and VSV for CCV, and VSV for CCV and ECM (See page IN-31 ).
NG Repair or replace harness or connector.
2001 SIENNA (RM787U)
Author : Date : 246
DI-93
DIAGNOSTICS - ENGINE
OK
Check and replace ECM (See page IN-31 ).
19 Check VSV for pressure switching valve.
PREPARATION:
ON
(a) Remove the grove compartment (See page SF-83 ).
TBP (b) Turn the ignition switch ON.
CHECK:
Check the VSV function.
(1) Connect between terminal TBP of the ECM connec-
tor and body ground (ON).
(2) Disconnect between terminal TBP of the ECM con-
OFF ON nector and body ground (OFF).
OK:
(1) VSV is ON:
Air from port E flows out through port F.
(2) VSV is OFF:
Air does not flow from port E to port F.
E E
Air F Air F
BE6653
A10618 VSV is ON VSV is OFF OK Go to step 22
A10607
A10606 A10619
NG
20 Check operation of VSV for pressure switching valve (See page SF-75 ).
OK Go to step 21.
NG
Replace VSV and charcoal canister, and then clean vacuum hoses between charcoal canister
and VSV for pressure switching valve, and VSV for pressure switching valve and fuel tank.
21 Check for open and short in harness and connector between EFI main relay
(Marking: EFI) and VSV for pressure switching valve, and VSV for pressure
switching valve and ECM (See page IN-31 ).
2001 SIENNA (RM787U)
Author : Date : 247
DI-94
DIAGNOSTICS - ENGINE
NG Repair or replace harness or connector.
OK
Check and replace ECM (See page IN-31 ).
22 Check fuel tank over fill check valve (See page EC-6 ).
NG Replace fuel tank over fill check valve or fuel
tank.
OK
Check and replace charcoal canister (See
page EC-6 ).
2001 SIENNA (RM787U)
Author : Date : 248
◦ Jabse Service Manual Search 2026 ◦ Jabse Pravopis ◦ onTap.bg ◦ Other service manual resources online : Fixya ◦ eServiceinfo