Service Manuals, User Guides, Schematic Diagrams or docs for : . Car Manuals Toyota Sienna 1998-2003 Approved FSM 24 bodypane centerbo
<< Back | HomeMost service manuals and schematics are PDF files, so You will need Adobre Acrobat Reader to view : Acrobat Download Some of the files are DjVu format. Readers and resources available here : DjVu Resources
For the compressed files, most common are zip and rar. Please, extract files with Your favorite compression software ( WinZip, WinRAR ... ) before viewing. If a document has multiple parts, You should download all, before extracting.
Good luck. Repair on Your own risk. Make sure You know what You are doing.
Image preview - the first page of the document
>> Download centerbo documenatation <<
Text preview - extract from the document
                                                  BODY PANEL REPLACEMENT                                                    RE-31

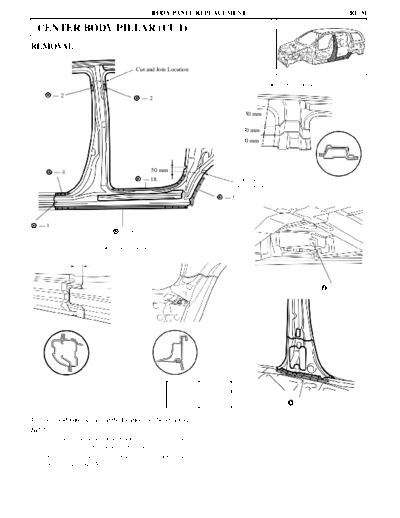
     CENTER BODY PILLAR (CUT)
REMOVAL

                                            Cut and Join Location

                                                                                            [Cut and Join Location]
           --2
                                              --2

                                                                                   150 mm

                                                                                   50 mm
                                                                                   50 mm


           --4                                    50 mm
                                              -- 18                              Cut and
                                                                                 Join Location
                                                                           --5


     --1
                                    -- 28

                           [Cut and Join Locations]
                 50 mm


                                                                                                                      --1


                                                            mm      in.
                                                             50     1.97
                                                            150     5.91                                 -- 15

1.     Cut and join the parts at the locations as shown above.
HINT:
1) Shift the each cut and jon locations of the center outer
    pillar, reinforcement and inner pillar.
2)     Shift the each cut and join locations of the rocker outer
       panel and rocker No.3 reinforcement.
RE-32                                            BODY PANEL REPLACEMENT
INSTALLATION


                                                                 Center Body Pillar Reinforcement


                                                               --4


         Lower Outer         --2
         No.1 Rail

                                           --5


                                                       Rocker Panel
                                                       No.3 Reinforcement

                                                                                       Butt Weld


                                           Butt Weld

                                                                                                                     --1


                  -- 33                       -- 34


                                                                                                         -- 15

                   --4
     Butt Weld


                    --4
                                                       -- 12
      Butt Weld                    -- 13
                          --5

1.      Before temporarily installing the new parts, weld the        2.     Temporarily install the new parts and measure each
        rocker panel No.3 reinforcement and center body pil-                part in accordance with the body dimension diagram.
        lar reinforcement and lower outer No.1 rail with stan-       3.     Before welding the new parts, check the fit of the front
        dard points.                                                        door and slide door.
                                              BODY PANEL REPLACEMENT                                                           RE-33

                                                                                   [Foamed Material Application Areas]


                                             Butt Weld


                     A               A


                                                                                        A-A                              C-C


                                             -- 32
                                                     -- 17
           -- 32
                                                                                       Butt Weld
                                                             C

              B                          B                                        C


                                                                                                            B-B
                                                                                        Body Sealer
                                                                                 --7
     --1
                                   -- 34


                                                                 Body Sealer


                                                 about 5 mm


                             -- 16


                                                             --2


                           -- 14
                                                         mm                in.
                                                         5             0.20                                              --1


4.   Before temporarily installing the new parts, apply               5.         After welding the center and rocker reinforcement and
     body sealer to the wheel arch.                                              inner pillar to the vehicle install the outer pillar.
HINT:                                                                 6.         Apply foamed material to the pillar and quarter sec-
1) Apply body sealer about 5 mm (0.20 in.) from the                              tions.
    flange avoiding any oozing.
2) Apply sealer evenly, about 3 - 4 mm (0.12 - 0.16 in.)
    in diameter.
3) For other sealing points, refer to section AR.
◦ Jabse Service Manual Search 2026 ◦ Jabse Pravopis ◦ onTap.bg ◦ Other service manual resources online : Fixya ◦ eServiceinfo