Service Manuals, User Guides, Schematic Diagrams or docs for : . Car Manuals Toyota Sienna 2004-2007 Approved SRM 05 20ulp x040001
<< Back | HomeMost service manuals and schematics are PDF files, so You will need Adobre Acrobat Reader to view : Acrobat Download Some of the files are DjVu format. Readers and resources available here : DjVu Resources
For the compressed files, most common are zip and rar. Please, extract files with Your favorite compression software ( WinZip, WinRAR ... ) before viewing. If a document has multiple parts, You should download all, before extracting.
Good luck. Repair on Your own risk. Make sure You know what You are doing.
Image preview - the first page of the document
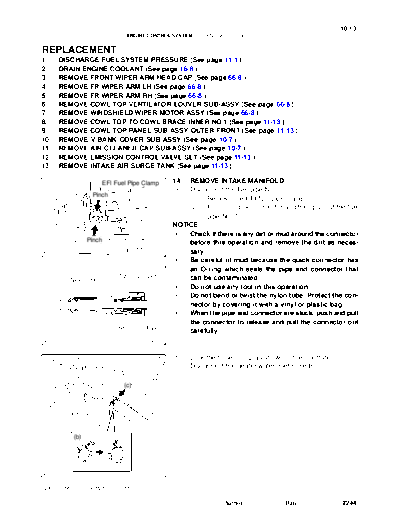
>> Download x040001 documenatation <<
Text preview - extract from the document
10-13
ENGINE CONTROL SYSTEM - KNOCK SENSOR
100F4-03
REPLACEMENT
1. DISCHARGE FUEL SYSTEM PRESSURE (See page 11-1 )
2. DRAIN ENGINE COOLANT (See page 16-8 )
3. REMOVE FRONT WIPER ARM HEAD CAP (See page 66-8 )
4. REMOVE FR WIPER ARM LH (See page 66-8 )
5. REMOVE FR WIPER ARM RH (See page 66-8 )
6. REMOVE COWL TOP VENTILATOR LOUVER SUB-ASSY (See page 66-8 )
7. REMOVE WINDSHIELD WIPER MOTOR ASSY (See page 66-8 )
8. REMOVE COWL TOP TO COWL BRACE INNER NO.1 (See page 11-13 )
9. REMOVE COWL TOP PANEL SUB-ASSY OUTER FRONT (See page 11-13 )
10. REMOVE V-BANK COVER SUB-ASSY (See page 10-7 )
11. REMOVE AIR CLEANER CAP SUB-ASSY (See page 10-7 )
12. REMOVE EMISSION CONTROL VALVE SET (See page 11-13 )
13. REMOVE INTAKE AIR SURGE TANK (See page 11-13 )
EFI Fuel Pipe Clamp 14. REMOVE INTAKE MANIFOLD
(a) Disconnect the fuel pipe No. 1.
Pinch
(1) Remove the EFI fuel pipe clamp.
(2) Pinch the tube connector and then pull out the fuel
pipe No. 1.
NOTICE:
S Check if there is any dirt or mud around the connector
Pinch
before this operation and remove the dirt as neces-
A79758 sary.
S Be careful of mud because the quick connector has
an O-ring which seals the pipe and connector that
Tube Connector can be contaminated.
Nylon Tube
S Do not use any tool in this operation.
S Do not bend or twist the nylon tube. Protect the con-
nector by covering it with a vinyl or plastic bag.
S When the pipe and connector are stuck, push and pull
the connector to release and pull the connector out
O-ring Pipe carefully.
A75650
(b) Lock the hose clamp as shown in the illustration.
(c) Disconnect the heater water inlet hose B.
(c)
(b)
A79759
2005 SIENNA REPAIR MANUAL (RM1163U)
Author : Date : 2244
10-14
ENGINE CONTROL SYSTEM - KNOCK SENSOR
(d) Remove the nut and the ground cable.
(e) (e)
(d) (e) Disconnect the 6 fuel injector connectors.
(e)
(e)
(e)
(e)
A79753
(f) In order to remove the intake manifold, using several
steps, remove the 9 bolts and the 2 nuts in the sequence
shown in the illustration.
15. REMOVE ENGINE MOUNTING STAY RH
(a) Remove the 2 bolts and the engine mounting stay.
4 10
2
8 6
3 11 5
1
7 9
A79754
16. REMOVE WATER OUTLET
(a) (a) Disconnect the radiator hose inlet.
(b) Disconnect the radiator reserve tank hose.
(b)
A79755
2005 SIENNA REPAIR MANUAL (RM1163U)
Author : Date : 2245
10-15
ENGINE CONTROL SYSTEM - KNOCK SENSOR
(c) Disconnect the engine coolant temperature sensor con-
(f) nector.
(d) Remove the clamp.
(c)
(e) Remove the 2 bolts, the 2 nuts and the 2 washers.
(f) Lock the hose clamp as shown in the illustration and re-
move the water outlet together with the water by-pass
hose No. 1.
(g) Remove the 2 gaskets from the 2 cylinder heads.
(d)
A79756
17. REMOVE KNOCK SENSOR
(a) Disconnect the 2 knock sensor connectors.
(b) Remove the 2 nuts and the 2 knock sensors.
A79748
18. INSTALL KNOCK SENSOR
Upper (a) Install the 2 knock sensors with the 2 nuts as shown in the
illustration.
0 to 5_ Torque: 20 Nm (199 kgfcm, 14 ftlbf)
(b) Connect the 2 knock sensor connectors.
Engine 19. INSTALL WATER OUTLET
Front (a) Install 2 new gaskets to the 2 cylinder heads.
(b) Install the water outlet together with the water by-pass
A79750 hose No. 1 and unlock the hose clamp.
(c) Tighten the 2 bolts, the 2 nuts and 2 washers.
Torque: 15 Nm (153 kgfcm, 11 ftlbf)
(d) Install the clamp.
(e) Connect the engine coolant temperature sensor connec-
tor.
(f) Connect the radiator reserve tank hose.
(g) Connect the radiator hose inlet.
20. INSTALL ENGINE MOUNTING STAY RH
Torque: 23 Nm (235 kgfcm, 17 ftlbf)
2005 SIENNA REPAIR MANUAL (RM1163U)
Author : Date : 2246
10-16
ENGINE CONTROL SYSTEM - KNOCK SENSOR
21. INSTALL INTAKE MANIFOLD
(a) Install the intake manifold with the 9 bolts and the 2 nuts.
Using several steps, tighten the bolts and the nuts uni-
formly in the sequence shown in the illustration.
(b) Retighten the 2 bolts and 2 nuts of the water outlet.
Torque: 15 Nm (153 kgfcm, 11 ftlbf)
(c) Retighten the water outlet mounting bolts and nuts.
Torque: 15 Nm (153 kgfcm, 11 ftlbf)
(d) Install the ground cable with the nut.
Torque: 8.4 Nm (86 kgfcm, 74 in.lbf)
(e) Connect the heater water inlet hose B.
8 2
10
4 6
9
1 7
11
5 3
A79754
EFI Fuel Pipe Clamp (f) Connect the fuel pipe No. 1.
Push (1) Push in the fuel tube connector to the pipe until fuel
tube connector makes "click" sound.
NOTICE:
S Check if there is any damage or foreign objects on the
connected part.
S After connecting, check if the connector and the pipe
are securely connected by pulling on them.
A81612 (2) Install the EFI fuel pipe clamp.
22. INSTALL INTAKE AIR SURGE TANK (See page 11-13 )
23. INSTALL EMISSION CONTROL VALVE SET (See page 11-13 )
24. INSTALL AIR CLEANER CAP SUB-ASSY (See page 10-7 )
25. ADD ENGINE COOLANT (See page 16-8 )
26. CHECK FOR FUEL LEAKS (See page 11-4 )
27. CHECK FOR ENGINE COOLANT LEAKS (See page 16-1 )
28. INSTALL V-BANK COVER SUB-ASSY (See page 10-7 )
29. INSTALL COWL TOP PANEL SUB-ASSY OUTER FRONT (See page 11-13 )
30. INSTALL COWL TOP TO COWL BRACE INNER NO.1 (See page 11-13 )
31. INSTALL WINDSHIELD WIPER MOTOR ASSY (See page 66-8 )
32. INSTALL COWL TOP VENTILATOR LOUVER SUB-ASSY
33. INSTALL FR WIPER ARM RH (See page 66-8 )
34. INSTALL FR WIPER ARM LH (See page 66-8 )
35. INSTALL FRONT WIPER ARM HEAD CAP
2005 SIENNA REPAIR MANUAL (RM1163U)
Author : Date : 2247
◦ Jabse Service Manual Search 2026 ◦ Jabse Pravopis ◦ onTap.bg ◦ Other service manual resources online : Fixya ◦ eServiceinfo