Service Manuals, User Guides, Schematic Diagrams or docs for : . Car Manuals Toyota Sienna 2004-2007 Approved SRM 15 21p04756 w040001
<< Back | HomeMost service manuals and schematics are PDF files, so You will need Adobre Acrobat Reader to view : Acrobat Download Some of the files are DjVu format. Readers and resources available here : DjVu Resources
For the compressed files, most common are zip and rar. Please, extract files with Your favorite compression software ( WinZip, WinRAR ... ) before viewing. If a document has multiple parts, You should download all, before extracting.
Good luck. Repair on Your own risk. Make sure You know what You are doing.
Image preview - the first page of the document
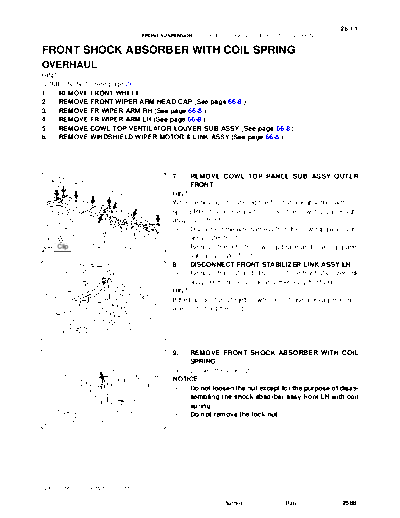
>> Download w040001 documenatation <<
Text preview - extract from the document
26-1 1
FRONT SUSPENSION - FRONT SHOCK ABSORBER WITH COIL SPRING
FRONT SHOCK ABSORBER WITH COIL SPRING
260M0-01
OVERHAUL
HINT:
COMPONENTS: See page 26-3 .
1. REMOVE FRONT WHEEL
2. REMOVE FRONT WIPER ARM HEAD CAP (See page 66-8 )
3. REMOVE FR WIPER ARM RH (See page 66-8 )
4. REMOVE FR WIPER ARM LH (See page 66-8 )
5. REMOVE COWL TOP VENTILATOR LOUVER SUB-ASSY (See page 66-8 )
6. REMOVE WINDSHIELD WIPER MOTOR & LINK ASSY (See page 66-8 )
7. REMOVE COWL TOP PANEL SUB- ASSY OUTER
FRONT
HINT:
When removing or installing the front shock absorber with coil
spring RH, it is necessary to remove the cowl top panel sub-
assy outer front.
(a) Disconnect the wire harness from the cowl top panel sub-
assy outer front.
Clip F49306 (b) Remove the 9 bolts, cowl top brace and cowl top panel
sub-assy outer front.
8. DISCONNECT FRONT STABILIZER LINK ASSY LH
(a) Remove the nut and disconnect the front stabilizer link
assy LH from the shock absorber assy front LH.
HINT:
If the ball joint turns together with the nut, use a hexagon (6 mm)
wrench to hold the stud.
F45196
9. REMOVE FRONT SHOCK ABSORBER WITH COIL
SPRING
(a) Loosen the lock nut.
NOTICE:
S Do not loosen the nut except for the purpose of disas-
sembling the shock absorber assy front LH with coil
spring.
S Do not remove the lock nut.
F44629
2005 SIENNA REPAIR MANUAL (RM1163U)
Author : Date : 2588
26-12
FRONT SUSPENSION - FRONT SHOCK ABSORBER WITH COIL SPRING
(b) Remove the bolt, and disconnect the front flexible hose
No.1 and speed sensor front LH.
C65925
(c) Remove the 2 nuts and 2 bolts on the lower side of the
front shock absorber with coil spring.
NOTICE:
When removing the bolt, hold the nut not to rotate.
F13683
(d) Remove the 3 nuts on the upper side of the front shock
absorber with coil spring.
(e) Remove the front shock absorber with the coil spring.
F44630
10. FIX FRONT SHOCK ABSORBER WITH COIL SPRING
(a) Install 2 nuts and a bolt to the bracket at the lower side of
SST
the front shock absorber with coil spring and secure it in
a vise.
SST
F03956
11. REMOVE FRONT SUSPENSION SUPPORT SUB-ASSY LH
(a) Using SST, compress the front coil spring LH.
SST 09727-30021 (09727-00010, 09727-00021, 09727-00031)
NOTICE:
Do not use an impact wrench. It will damage the SST.
HINT:
Use 2 SST of the same type.
(b) Remove the lock nut and the front suspension support sub-assy.
12. REMOVE FRONT SUSPENSION SUPPORT LH BEARING
13. REMOVE FRONT COIL SPRING SEAT UPPER LH
2005 SIENNA REPAIR MANUAL (RM1163U)
Author : Date : 2589
26-13
FRONT SUSPENSION - FRONT SHOCK ABSORBER WITH COIL SPRING
14. REMOVE FRONT COIL SPRING INSULATOR UPPER LH
15. REMOVE FRONT COIL SPRING LH
16. REMOVE FRONT SPRING BUMPER LH
17. REMOVE FRONT COIL SPRING INSULATOR LOWER LH
18. REMOVE SHOCK ABSORBER ASSY FRONT LH
19. INSPECT SHOCK ABSORBER ASSY FRONT LH
(a) Compress and extend the shock absorber rod and check
that there is no unusual resistance or unusual sound dur-
ing operation.
If there is any abnormality, replace the shock absorber assy
front LH with a new one.
NOTICE:
When disposing of the shock absorber assy front LH, see
W03646 DISPOSAL on page 26-16 .
20. INSTALL SHOCK ABSORBER ASSY FRONT LH
21. INSTALL FRONT COIL SPRING INSULATOR LOWER LH
(a) Install the front coil spring insulator lower LH onto the shock absorber assy front LH.
22. INSTALL FRONT SPRING BUMPER LH
(a) Install the front spring bumper LH to the piston rod.
23. INSTALL FRONT COIL SPRING LH
SST (a) Using SST, compress the front coil spring LH.
SST 09727- 30021 (09727- 00010, 09727- 00021,
09727-00031)
NOTICE:
Do not use an impact wrench. It will damage the SST.
SST HINT:
Use 2 SST of the same type.
F40160 (b) Install the front coil spring LH to the shock absorber assy
front LH.
HINT:
Fit the front coil spring insulator lower LH into the gap of the
shock absorber assy front LH.
24. INSTALL FRONT COIL SPRING INSULATOR UPPER
Outside LH
Outside
5_ 5_ (a) Install the front coil spring insulator upper LH as shown in
the illustration.
F40168
2005 SIENNA REPAIR MANUAL (RM1163U)
Author : Date : 2590
26-14
FRONT SUSPENSION - FRONT SHOCK ABSORBER WITH COIL SPRING
Outside 25. INSTALL FRONT COIL SPRING SEAT UPPER LH
(a) Install the front coil spring seat upper LH to the shock ab-
5_ 5_ sorber assy front LH with the mark facing to the outside
of the vehicle.
F40161
26. INSTALL FRONT SUSPENSION SUPPORT LH
BEARING
(a) Install the front suspension support LH bearing.
F40162
Outside 27. INSTALL FRONT SUSPENSION SUPPORT
Outside
SUB-ASSY LH
(a) Install the front suspension support sub-assy LH with the
mark facing to the outside of the vehicle.
(b) Temporarily tighten a new lock nut.
28. INSTALL FRONT SHOCK ABSORBER WITH COIL
SPRING
(a) Install the front shock absorber with coil spring as shown
F40169 in the illustration.
(b) Install the 3 nuts to the upper side of the front shock ab-
sorber with coil spring.
Torque: 80 Nm (816 kgfcm, 59 ftlbf)
F44630
(c) Install the 2 bolts and 2 nuts to the lower side of the front
shock absorber with coil spring.
Torque: 210 Nm (2,140 kgfcm, 155 ftlbf)
NOTICE:
When installing the bolt, hold the nut not to rotate.
F13683
2005 SIENNA REPAIR MANUAL (RM1163U)
Author : Date : 2591
26-15
FRONT SUSPENSION - FRONT SHOCK ABSORBER WITH COIL SPRING
(d) Fully tighten the lock nut.
Torque: 49 Nm (500 kgfcm, 36 ftlbf)
F44629
(e) Install the front flexible hose No.1 and speed sensor front
LH with the bolt.
Torque: 19 Nm (189 kgfcm, 14 ftlbf)
C65925
29. INSTALL FRONT STABILIZER LINK ASSY LH
(a) Install the front stabilizer link assy LH with the nut.
Torque: 74 Nm (755 kgfcm, 55 ftlbf)
HINT:
If the ball joint turns together with the nut, use a hexagon (6 mm)
wrench to hold the stud.
F45196
30. INSTALL COWL TOP PANEL SUB- ASSY OUTER
FRONT
(a) Install the cowl top brace and cowl top panel sub-assy
outer front with the 9 bolts.
Torque: 7.5 Nm (76 kgfcm, 66 in.lbf)
(b) Connect the wire harness to the cowl top panel sub-assy
outer front.
Clip F49306
31. INSTALL WINDSHIELD WIPER MOTOR & LINK ASSY (See page 66-8 )
32. INSTALL FR WIPER ARM LH (See page 66-8 )
33. INSTALL FR WIPER ARM RH (See page 66-8 )
34. INSTALL FRONT WHEEL
Torque: 103 Nm (1,050 kgfcm, 76 ftlbf)
35. INSPECT AND ADJUST FRONT WHEEL ALIGNMENT (See page 26-7 )
2005 SIENNA REPAIR MANUAL (RM1163U)
Author : Date : 2592
◦ Jabse Service Manual Search 2026 ◦ Jabse Pravopis ◦ onTap.bg ◦ Other service manual resources online : Fixya ◦ eServiceinfo