Service Manuals, User Guides, Schematic Diagrams or docs for : . Car Manuals Toyota Sienna 2004-2007 Approved SRM 17 209d0 x040001
<< Back | HomeMost service manuals and schematics are PDF files, so You will need Adobre Acrobat Reader to view : Acrobat Download Some of the files are DjVu format. Readers and resources available here : DjVu Resources
For the compressed files, most common are zip and rar. Please, extract files with Your favorite compression software ( WinZip, WinRAR ... ) before viewing. If a document has multiple parts, You should download all, before extracting.
Good luck. Repair on Your own risk. Make sure You know what You are doing.
Image preview - the first page of the document
>> Download x040001 documenatation <<
Text preview - extract from the document
27-10
REAR SUSPENSION - COIL SPRING REAR LH
COIL SPRING REAR LH
270DV-02
REPLACEMENT
HINT:
COMPONENTS: See page 27-2
1. REMOVE REAR WHEEL
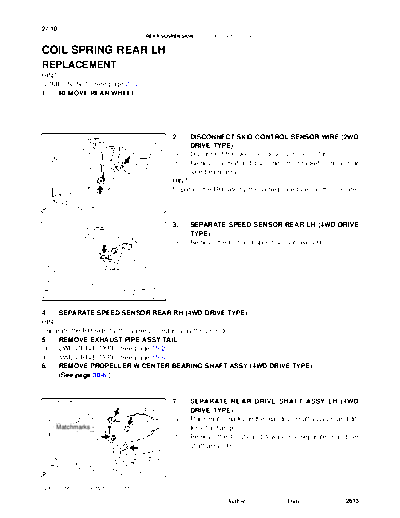
2. DISCONNECT SKID CONTROL SENSOR WIRE (2WD
DRIVE TYPE)
(a) Disconnect the skid control sensor connector.
(b) Remove the bolt and disconnect the bracket from the rear
axle beam assy.
HINT:
Separate the RH side by the same procedures as the LH side.
G23899
3. SEPARATE SPEED SENSOR REAR LH (4WD DRIVE
TYPE)
(a) Remove the bolt and speed sensor rear LH.
G23898
4. SEPARATE SPEED SENSOR REAR RH (4WD DRIVE TYPE)
HINT:
Separate the RH side by the same procedures as the LH side.
5. REMOVE EXHAUST PIPE ASSY TAIL
(a) 2WD DRIVE TYPE (See page 15-2 )
(b) 4WD DRIVE TYPE (See page 15-6 )
6. REMOVE PROPELLER W/CENTER BEARING SHAFT ASSY (4WD DRIVE TYPE)
(See page 30-6 )
7. SEPARATE REAR DRIVE SHAFT ASSY LH (4WD
DRIVE TYPE)
(a) Place matchmarks on the rear drive shaft assy LH and dif-
Matchmarks ferential flange.
(b) Remove the 4 nuts and 4 washers, separate rear drive
shaft assy LH.
G23905
2005 SIENNA REPAIR MANUAL (RM1163U)
Author : Date : 2613
27-1 1
REAR SUSPENSION - COIL SPRING REAR LH
8. SEPARATE REAR DRIVE SHAFT ASSY RH (4WD DRIVE TYPE)
HINT:
Separate the RH side by the same procedures as the LH side.
9. REMOVE DIFFERENTIAL CARRIER ASSY REAR (4WD DRIVE TYPE) (See page 29-10 )
10. SEPARATE PARKING BRAKE CABLE ASSY NO.3
(a) Remove the 2 bolts and parking brake cable assy No.3.
G23904
11. SEPARATE PARKING BRAKE CABLE ASSY NO.2
HINT:
Separate the RH side by the same procedures as the LH side.
12. SEPARATE REAR BRAKE TUBE NO.2
(a) Using SST, separate the brake tube from the flexible
hose. Catch the brake fluid with a container as it drains
out.
SST
SST 09023-00101
G25779
(b) Remove the clip, and separate the flexible hose.
G25780
2005 SIENNA REPAIR MANUAL (RM1163U)
Author : Date : 2614
27-12
REAR SUSPENSION - COIL SPRING REAR LH
(c) Remove the bolt and separate the brake tube from rear
axle beam assy.
C88688
13. SEPARATE REAR BRAKE TUBE NO.1
SST 09023-00101
HINT:
Separate the RH side by the same procedures as the LH side.
14. REMOVE FUEL TANK FILLER HOSE COVER
(a) Remove the 2 bolts, 3 screws, 3 nuts and fuel tank filler pipe protector.
(b) Remove the 3 bolts and fuel tank filler hose cover.
15. REMOVE REAR FLOOR NO.2 CROSSMEMBER BRACE LH
(a) Remove the 2 bolts and floor No.2 crossmember brace.
16. REMOVE REAR FLOOR NO.2 CROSSMEMBER BRACE RH
HINT:
Remove the RH side by the same procedures as the LH side.
17. LOOSEN REAR AXLE BEAM ASSY
HINT:
Loosen the RH side by the same procedures as the LH side.
NOTICE:
S When loosening the bolt, hold the nut not to rotate.
S Do not remove the bolt and nut.
G25783
18. SEPARATE SHOCK ABSORBER ASSY REAR LH
(a) Support the rear axle beam assy with a jack.
C88670
2005 SIENNA REPAIR MANUAL (RM1163U)
Author : Date : 2615
27-13
REAR SUSPENSION - COIL SPRING REAR LH
(b) Remove the bolt and separate the shock absorber assy
rear LH.
C88671
19. SEPARATE SHOCK ABSORBER ASSY REAR RH
HINT:
Separate the RH side by the same procedures as the LH side.
20. REMOVE COIL SPRING REAR LH
(a) Apply a shop rug between the coil spring rear LH and rear
axle beam assy.
C88693
(b) Apply a shop rug between the coil spring rear RH and rear
axle beam assy.
(c) Remove the coil spring LH by slowly lowering the jack.
C88694
21. REMOVE REAR COIL SPRING INSULATOR UPPER
LH
(a) Remove the rear coil spring insulator upper LH from the
coil spring rear LH.
G24682
2005 SIENNA REPAIR MANUAL (RM1163U)
Author : Date : 2616
27-14
REAR SUSPENSION - COIL SPRING REAR LH
22. INSTALL REAR COIL SPRING INSULATOR UPPER LH
(a) Install the insulator upper LH to the coil spring rear LH.
Upper
Lower
G24699
23. INSTALL COIL SPRING REAR LH
(a) Apply a shop rug to the rear axle beam assy.
C88694
(b) Install the coil spring rear LH to the rear axle beam assy.
HINT:
Fit the lower end of the coil spring into the gap of the spring low-
Lower End
er seat.
C65863 G25781
(c) Apply a shop rug to the rear axle beam assy.
C88693
2005 SIENNA REPAIR MANUAL (RM1163U)
Author : Date : 2617
27-15
REAR SUSPENSION - COIL SPRING REAR LH
24. CONNECT SHOCK ABSORBER ASSY REAR LH
(a) While raising the jack, connect the shock absorber assy
rear LH to the rear axle beam assy.
(b) Temporarily tighten the nut.
C88671
25. CONNECT SHOCK ABSORBER ASSY REAR RH
HINT:
Connect the RH side by the same procedures as the LH side.
26. CONNECT REAR BRAKE TUBE NO.2
(a) Install the flexible hose and clip.
G25780
(b) Using SST, connect the brake tube to the flexible hose.
Torque: 15 Nm (153 kgfcm, 11 ftlbf)
SST 09023-00101
SST
G25779
(c) Install the bolt.
Torque: 8.0 Nm (82 kgfcm, 71 in.lbf)
C88688
27. CONNECT REAR BRAKE TUBE NO.1
SST 09023-00101
HINT:
Connect the RH side by the same procedures as the LH side.
2005 SIENNA REPAIR MANUAL (RM1163U)
Author : Date : 2618
27-16
REAR SUSPENSION - COIL SPRING REAR LH
28. INSTALL PARKING BRAKE CABLE ASSY NO.3
(a) Install the 2 bolts and parking brake cable assy No.3 to
the rear axle beam assy.
Torque: 8.0 Nm (82 kgfcm, 71 in.lbf)
G23904
29. INSTALL PARKING BRAKE CABLE ASSY NO.2
HINT:
Install the RH side by same procedures as the LH side.
30. INSTALL DIFFERENTIAL CARRIER ASSY REAR (4WD DRIVE TYPE) (See page 29-10 )
31. INSTALL REAR DRIVE SHAFT ASSY LH (4WD DRIVE
TYPE)
(a) Install the rear drive shaft assy LH, 4 washers and 4 nuts.
Matchmarks Torque: 56 Nm (571 kgfcm, 41 ftlbf)
G23905
32. INSTALL REAR DRIVE SHAFT ASSY RH (4WD DRIVE TYPE)
HINT:
Install the RH side by same procedures as the LH side.
33. INSTALL PROPELLER W/CENTER BEARING SHAFT ASSY (4WD DRIVE TYPE)
(See page 30-6 )
34. INSTALL SPEED SENSOR REAR LH (4WD DRIVE
TYPE)
(a) Install the speed sensor rear LH and bolt.
Torque: 8.0 Nm (82 kgfcm, 71 in.lbf)
G23898
2005 SIENNA REPAIR MANUAL (RM1163U)
Author : Date : 2619
27-17
REAR SUSPENSION - COIL SPRING REAR LH
35. INSTALL SPEED SENSOR REAR RH (4WD DRIVE TYPE)
HINT:
Install the RH side by same procedures as the LH side.
36. CONNECT SKID CONTROL SENSOR WIRE (2WD
DRIVE TYPE)
(a) Connect the skid control sensor connector.
(b) Install the bolt and bracket to the rear axle beam assy.
Torque: 8.0 Nm (82 kgfcm, 71 in.lbf)
HINT:
Connect the RH side by same procedures with the LH side.
G23899
37. INSTALL EXHAUST PIPE ASSY TAIL
(a) 2WD DRIVE TYPE (See page 15-2 )
(b) 4WD DRIVE TYPE (See page 15-6 )
38. BLEED BRAKE LINE (See page 32-4 )
39. INSPECT BRAKE FLUID LEVEL IN RESERVOIR
40. STABILIZE SUSPENSION
(a) Install the rear wheel and jack down the vehicle.
Torque: 103 Nm (1,050 kgfcm, 76 ftlbf)
(b) Bounce the vehicle up and down several times to stabilize the suspension.
41. FULLY TIGHTEN SHOCK ABSORBER ASSY REAR LH
(a) Stabilize the shock absorber assy rear LH.
If it is impossible to tighten the nut at this position, support the
rear axle beam assy with a jack and load the rear compartment
with a mass of approximately 90 kg (198 lb).
Length of shock absorber:
2WD DRIVE TYPE: 234 mm (9.2 in.)
4WD DRIVE TYPE: 258 mm (10.2 in.)
C88682
(b) Fully tighten the nut.
Torque: 115 Nm (1,173 kgfcm, 85 ftlbf)
C88671
42. FULLY TIGHTEN SHOCK ABSORBER ASSY REAR RH
HINT:
Fully tighten the RH side by same procedures as the LH side.
2005 SIENNA REPAIR MANUAL (RM1163U)
Author : Date : 2620
27-18
REAR SUSPENSION - COIL SPRING REAR LH
43. FULLY TIGHTEN REAR AXLE BEAM ASSY
(a) Stabilize the rear axle beam assy.
(b) Fully tighten the bolt.
Torque: 135 Nm (1,377 kgfcm, 100 ftlbf)
NOTICE:
S Tighten the bolt and not the nut.
S The vehicle height should be the same as the height
that the shock absorber is fully tightened.
G25783 HINT:
Fully tighten the RH side by same procedures as the LH side.
44. INSTALL REAR FLOOR NO.2 CROSSMEMBER BRACE LH
(a) Install the floor No.2 crossmember brace and 2 bolts.
Torque: 28 Nm (286 kgfcm, 21 ftlbf)
45. INSTALL REAR FLOOR NO.2 CROSSMEMBER BRACE RH
HINT:
Install the RH side by the same procedures as the LH side.
46. INSTALL FUEL TANK FILLER HOSE COVER
(a) Install the fuel tank filler pipe protector, 2 bolts, 3 screws and 3 nuts.
(b) Install the fuel tank filler hose cover and 3 bolts.
Torque: 5.0 Nm (51 kgfcm, 44 in.lbf)
47. INSPECT REAR WHEEL ALIGNMENT (See page 27-4 )
48. CHECK ABS SPEED SENSOR SIGNAL
(a) ABS WITH EBD SYSTEM (See page 05-386 )
(b) ABS WITH EBD & BA & TRAC & VSC SYSTEM (See page 05-435 )
2005 SIENNA REPAIR MANUAL (RM1163U)
Author : Date : 2621
◦ Jabse Service Manual Search 2026 ◦ Jabse Pravopis ◦ onTap.bg ◦ Other service manual resources online : Fixya ◦ eServiceinfo