Service Manuals, User Guides, Schematic Diagrams or docs for : . Car Manuals Toyota Sienna 2004-2007 Approved SRM 26 20tva w040001
<< Back | HomeMost service manuals and schematics are PDF files, so You will need Adobre Acrobat Reader to view : Acrobat Download Some of the files are DjVu format. Readers and resources available here : DjVu Resources
For the compressed files, most common are zip and rar. Please, extract files with Your favorite compression software ( WinZip, WinRAR ... ) before viewing. If a document has multiple parts, You should download all, before extracting.
Good luck. Repair on Your own risk. Make sure You know what You are doing.
Image preview - the first page of the document
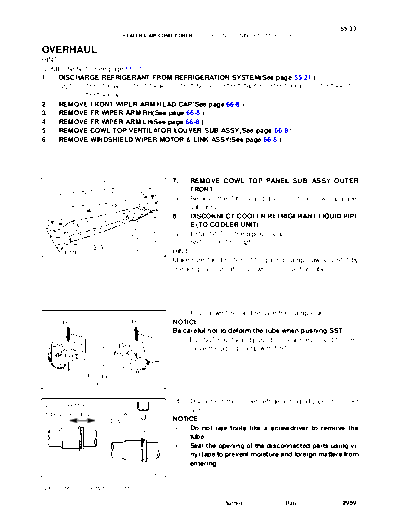
>> Download w040001 documenatation <<
Text preview - extract from the document
55-33
HEATER & AIR CONDITIONER - AIR CONDITIONING RADIATOR ASSY
550XZ-03
OVERHAUL
HINT:
COMPONENTS: See page 55-31
1. DISCHARGE REFRIGERANT FROM REFRIGERATION SYSTEM(See page 55-21 )
SST 07110-58060 (07117-58080, 07117-58090, 07117-78050, 07117-88060, 07117-88070,
07117-88080)
2. REMOVE FRONT WIPER ARM HEAD CAP(See page 66-8 )
3. REMOVE FR WIPER ARM RH(See page 66-8 )
4. REMOVE FR WIPER ARM LH(See page 66-8 )
5. REMOVE COWL TOP VENTILATOR LOUVER SUB-ASSY(See page 66-8 )
6. REMOVE WINDSHIELD WIPER MOTOR & LINK ASSY(See page 66-8 )
7. REMOVE COWL TOP PANEL SUB- ASSY OUTER
FRONT
(a) Remove the 7 bolts and disconnect the cowl top panel
sub-assy .
8. DISCONNECT COOLER REFRIGERANT LIQUID PIPE
E (TO COOLER UNIT)
(a) Install SST on the piping clamp.
SST 09870-00025
I34862 HINT:
Make sure the direction of the piping clamp claw and SST by
checking the illustration shown on the caution label.
(b) Push down SST and release the clamp lock.
Push Pull NOTICE:
Be careful not to deform the tube when pushing SST.
(c) Pull SST slightly and push the release lever, and then re-
move the piping clamp with SST.
SST
Release
Lever I03839
(d) Disconnect the cooler refrigerant liquid pipe (to cooler
Disconnect the
tube using hand Screw unit).
Driver NOTICE:
S Do not use tools like a screwdriver to remove the
tube.
S Seal the opening of the disconnected parts using vi-
nyl tape to prevent moisture and foreign matters from
entering.
I06919
2005 SIENNA REPAIR MANUAL (RM1163U)
Author : Date : 2959
55-34
HEATER & AIR CONDITIONER - AIR CONDITIONING RADIATOR ASSY
9. DISCONNECT SUCTION HOSE SUB-ASSY
SST 09870-00015
HINT:
Disconnection of the pipe cooler refrigerant suction hose sub-assy is the same way as the cooler refrigerant
liquid pipe E (to cooler unit).
10. REMOVE AIR CLEANER CAP SUB-ASSY(See page 10-7 )
11. DISCONNECT HEATER WATER OUTLET HOSE
A(FROM HEATER UNIT)
(a) Using pliers, grip the claws of the clip and slide the clip to
disconnect the heater water outlet hose A (from heater
unit).
I35742
12. DISCONNECT HEATER WATER INLET HOSE A
HINT:
Disconnection of the heater water inlet hose A is the same way as the heater water outlet hose A (from heater
unit).
13. REMOVE INSTRUMENT PANEL SUB-ASSY W/PASSENGER AIRBAG ASSY(See page 71-10 )
HINT:
Refer to the instructions for removal of the instrument panel sub-assy w/ passenger airbag assy.
14. REMOVE HEATER TO FOOT DUCT NO.3
(a) Remove the clip and the heater to foot duct No.3.
I34865
15. REMOVE HEATER TO FOOT DUCT NO.1
(a) Remove the clip and the heater to foot duct No.1.
I35500
2005 SIENNA REPAIR MANUAL (RM1163U)
Author : Date : 2960
55-35
HEATER & AIR CONDITIONER - AIR CONDITIONING RADIATOR ASSY
16. DISCONNECT TRANSMISSION CONTROL CABLE ASSY(See page 40-38 )
17. REMOVE SHIFT LOCK CONTROL UNIT ASSY(See page 40-38 )
18. REMOVE INSTRUMENT PANEL BRACKET NO.5
(a) Release the 2 clamps and disconnect the connector.
2 Clamps I34864
(b) Remove the 4 nuts and the instrument panel bracket
No.5.
I34863
19. REMOVE INSTRUMENT PANEL BRACE SUB-ASSY
NO.1
(a) Release the 4 clamps and remove the bolt and discon-
nect the connector.
4 Clamps
I34867
(b) Remove the 3 bolts, the 2 nuts and the instrument panel
brace sub-assy No.1.
I34866
2005 SIENNA REPAIR MANUAL (RM1163U)
Author : Date : 2961
55-36
HEATER & AIR CONDITIONER - AIR CONDITIONING RADIATOR ASSY
20. REMOVE INSTRUMENT PANEL BRACE SUB-ASSY
NO.2
(a) Release the 2 clamps and disconnect the connector.
2 Clamps I34869
(b) Remove the 3 bolts, the 2 nuts and the instrument panel
brace sub-assy No.2.
I34868
21. REMOVE STEERING COLUMN ASSY(See page 50-8 )
22. REMOVE ECM(See page 10-17 )
23. REMOVE STEREO COMPONENT AMPLIFIER ASSY (W/ STEREO COMPONENT AMPLIFIER)
(See page 67-23 )
24. REMOVE FRONT FENDER GARNISH RH(See page 76-22 )
25. REMOVE INSTRUMENT PANEL REINFORCEMENT
(a) Remove the 6 nuts.
(b) Release the 13 clamps.
(c) Disconnect the connectors.
13 Clamps I34870
2005 SIENNA REPAIR MANUAL (RM1163U)
Author : Date : 2962
55-37
HEATER & AIR CONDITIONER - AIR CONDITIONING RADIATOR ASSY
(d) Remove the 11 bolts, 2 nuts and the instrument panel re-
inforcement.
I34871
26. REMOVE DEFROSTER NOZZLE ASSY LOWER
(a) Release the 4 claw fittings and remove the defroster
nozzle assy lower.
4 Claws I34872
27. REMOVE AIR CONDITIONING UNIT ASSY
(a) Release the 2 claw fittings and remove the nut and the air
conditioning unit assy.
2 Claws I34873
28. REMOVE BLOWER ASSY
(a) Remove the 2 screws and the blower assy.
I35464
2005 SIENNA REPAIR MANUAL (RM1163U)
Author : Date : 2963
55-38
HEATER & AIR CONDITIONER - AIR CONDITIONING RADIATOR ASSY
29. REMOVE MODE DAMPER SERVO SUB-ASSY
(a) Remove the 3 screws and the mode damper servo sub-
assy.
I35465
30. REMOVE AIRMIX DAMPER SERVO SUB-ASSY
(a) Remove the 3 screws and the airmix damper servo sub-
assy.
I35466
31. REMOVE AIRMIX NO.2 DAMPER SERVO SUB-ASSY
(AUTO AIR CONDITIONING)
(a) Remove the 3 screws and the airmix No.2 damper servo
sub-assy .
I35467
32. REMOVE HEATER CLAMP NO.1
(a) Release the 4 claw fittings and remove the heater clamp
No.1.
4 Claws I35468
33. REMOVE AIR CONDITIONING RADIATOR BRACKET
NO.3
(a) Remove the screw and the air conditioning radiator brack-
et No.3.
I35523
2005 SIENNA REPAIR MANUAL (RM1163U)
Author : Date : 2964
55-39
HEATER & AIR CONDITIONER - AIR CONDITIONING RADIATOR ASSY
34. REMOVE HEATER RADIATOR UNIT SUB-ASSY
(a) Remove the heater radiator unit sub-assy from the air
conditioning radiator assy.
I35469
35. REMOVE COOLER THERMISTOR NO.1
36. REMOVE COOLING UNIT PACKING NO.3
(a) Remove the cooling unit packing No.3.
I35470
37. REMOVE AIR CONDITIONING TUBE ASSY
(a) Using a hexagon wrench 4.0 mm (0.15 in.), remove the
2 hexagon bolts and the air conditioning tube assy.
(b) Remove the 2 O-rings from the air conditioning tube assy.
I35520
38. REMOVE COOLER EXPANSION VALVE
(a) Remove the cooler expansion valve from the cooler evap-
orator sub-assy No.1.
I33483
2005 SIENNA REPAIR MANUAL (RM1163U)
Author : Date : 2965
55-40
HEATER & AIR CONDITIONER - AIR CONDITIONING RADIATOR ASSY
(b) Remove the 2 O-rings from the cooler evaporator Sub-
assy No.1.
I33483 I36016
39. REMOVE AIR CONDITIONING RADIATOR BRACKET
NO.2
(a) Remove the 2 screws and the air conditioning radiator
bracket No.2.
I35521
40. REMOVE AIR CONDITIONING RADIATOR BRACKET
NO.1
(a) Remove the 3 screws and the air conditioning radiator
bracket No.1.
I35845
41. REMOVE AIR CONDITIONING RADIATOR BRACKET
NO.4
(a) Remove the air conditioning radiator bracket No.4.
I35524
42. REMOVE AIR DUCT NO.1
(a) Release the 4 claw fittings and remove the air duct No.1.
4 Claws I35471
2005 SIENNA REPAIR MANUAL (RM1163U)
Author : Date : 2966
55-41
HEATER & AIR CONDITIONER - AIR CONDITIONING RADIATOR ASSY
43. INSTALL COOLER EXPANSION VALVE
(a) Sufficiently apply compressor oil to 2 new O-rings and the
fitting surface of the cooler evaporator sub-assy No.1.
Compressor oil: ND-OIL 8 or equivalent
I33483 I36016
(b) Install the cooler expansion valve to the cooler evaporator
sub-assy No.1.
I33483
44. INSTALL AIR CONDITIONING TUBE ASSY
(a) Sufficiently apply compressor oil to 2 new O-rings and the
fitting surface of the air conditioning tube assy.
Compressor oil: ND-OIL 8 or equivalent
(b) Install the 2 O-rings on the air conditioning tube assy.
(c) Using a hexagon wrench 4.0 mm (0.15 in.), install the air
conditioning tube assy with the 2 hexagon bolts.
Torque: 3.5 Nm (35 kgfcm, 30 in.lbf)
I35520
45. TEMPORARILY TIGHTEN AIR CONDITIONING UNIT
ASSY
(a) Temporarily tighten the air conditioning unit assy with the
nut.
Torque: 9.8 Nm (100 kgfcm, 87 in.lbf)
(b) Install the 2 clamps.
2 Clamps I34873
2005 SIENNA REPAIR MANUAL (RM1163U)
Author : Date : 2967
55-42
HEATER & AIR CONDITIONER - AIR CONDITIONING RADIATOR ASSY
46. INSTALL INSTRUMENT PANEL REINFORCEMENT
(a) Install the instrument panel reinforcement with the 10
bolts.
I35846
(b) Install the 13 clamps.
(c) Connect the connectors.
(d) Install the 6 nuts.
Torque: 7.3 Nm (74 kgfcm, 65 in.lbf)
I34870
2005 SIENNA REPAIR MANUAL (RM1163U)
Author : Date : 2968
55-43
HEATER & AIR CONDITIONER - AIR CONDITIONING RADIATOR ASSY
47. INSTALL AIR CONDITIONING UNIT ASSY
(a) Install the air conditioner unit assy with the 3 bolts and 2
nuts.
I36031
48. INSTALL SHIFT LOCK CONTROL UNIT ASSY(See page 40-38 )
49. CONNECT TRANSMISSION CONTROL CABLE ASSY(See page 40-38 )
50. INSTALL STEERING COLUMN ASSY(See page 50-8 )
51. INSTALL INSTRUMENT PANEL SUB-ASSY W/PASSENGER AIRBAG ASSY(See page 71-10 )
52. INSTALL SUCTION HOSE SUB-ASSY
Connect Wrong (a) Lubricate a new O-ring with compressor oil and install it
Gap on the hose.
Compressor oil: ND-OIL 8 or equivalent
(b) Install the suction hose sub-assy and the piping clamp.
HINT:
After the connection, check the claw fitting of the piping clamp.
I06878
53. INSTALL COOLER REFRIGERANT LIQUID PIPE E (TO COOLER UNIT)
(a) Lubricate a new O-ring with compressor oil and install it to the pipe.
Compressor oil: ND-OIL 8 or equivalent
(b) Install the cooler refrigerant liquid pipe E and the piping clamp.
HINT:
After the connection, check the claw fitting of the piping clamp.
54. ADJUST SHIFT LEVER POSITION(See page 40-44 )
55. INSPECT SHIFT LEVER POSITION(See page 40-44 )
56. INSPECT CHECK KEY INTERLOCK OPERATION(See page 40-34 )
57. INSPECT CHECK SHIFT LOCK OPERATION(See page 40-34 )
58. INSPECT CHECK SHIFT LOCK RELEASE BUTTON OPERATION(See page 40-34 )
59. ADD COOLANT(See page 16-8 )
2005 SIENNA REPAIR MANUAL (RM1163U)
Author : Date : 2969
55-44
HEATER & AIR CONDITIONER - AIR CONDITIONING RADIATOR ASSY
60. CHARGE REFRIGERANT(See page 55-21 )
SST 07110-58060 (07117-58060, 07117-58070, 07117-58080, 07117-58090, 07117-78050,
07117-88060, 07117-88070, 07117-88080)
Specified amount: 780 " 30 g (27.5 " 1.06 oz.)
61. WARM UP ENGINE
62. CHECK FOR ENGINE COOLANT LEAKS(See page 16-1 )
63. INSPECT LEAKAGE OF REFRIGERANT(See page 55-21 )
2005 SIENNA REPAIR MANUAL (RM1163U)
Author : Date : 2970
◦ Jabse Service Manual Search 2026 ◦ Jabse Pravopis ◦ onTap.bg ◦ Other service manual resources online : Fixya ◦ eServiceinfo