Service Manuals, User Guides, Schematic Diagrams or docs for : . Car Manuals Toyota Sienna 2004-2007 Approved SRM 36 72 20twu w040001
<< Back | HomeMost service manuals and schematics are PDF files, so You will need Adobre Acrobat Reader to view : Acrobat Download Some of the files are DjVu format. Readers and resources available here : DjVu Resources
For the compressed files, most common are zip and rar. Please, extract files with Your favorite compression software ( WinZip, WinRAR ... ) before viewing. If a document has multiple parts, You should download all, before extracting.
Good luck. Repair on Your own risk. Make sure You know what You are doing.
Image preview - the first page of the document
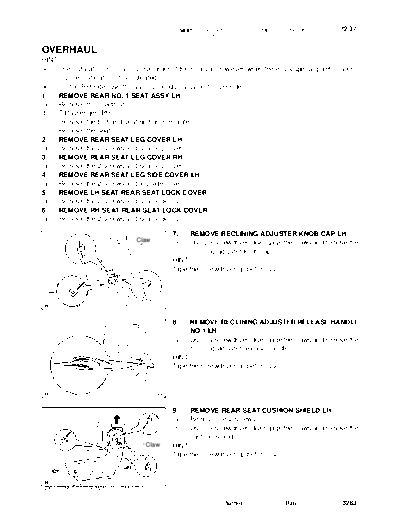
>> Download w040001 documenatation <<
Text preview - extract from the document
SEAT - REAR NO. 1 SEAT ASSEMBLY LH (CAPTAIN SEAT 72-37
TYPE)
720IN-02
OVERHAUL
HINT:
S The installation is in the reverse order of the removal. However, when there is a special point concern-
ing the installation, it is indicated.
S On the RH side, use the same procedures as on the LH side.
1. REMOVE REAR NO. 1 SEAT ASSY LH
(a) Remove the headrest.
(b) 7-Passenger RH:
Remove the bolt and seat belt anchor plate.
(c) Remove the seat.
2. REMOVE REAR SEAT LEG COVER LH
(a) Remove the 2 screws and seat leg cover.
3. REMOVE REAR SEAT LEG COVER RH
(a) Remove the 2 screws and seat leg cover.
4. REMOVE REAR SEAT LEG SIDE COVER LH
(a) Remove the 2 screws and leg side cover.
5. REMOVE LH SEAT REAR SEAT LOCK COVER
(a) Remove the 2 screws and seat lock cover.
6. REMOVE RH SEAT REAR SEAT LOCK COVER
(a) Remove the 2 screws and seat lock cover.
7. REMOVE RECLINING ADJUSTER KNOB CAP LH
Claw (a) Using a screwdriver, disengage the claws and remove the
reclining adjuster knob cap.
HINT:
Tape the screwdriver tip before use.
B67445
8. REMOVE RECLINING ADJUSTER RELEASE HANDLE
NO.1 LH
(a) Using a screwdriver, disengage the claws and remove the
reclining adjuster release handle.
HINT:
Tape the screwdriver tip before use.
B67446
9. REMOVE REAR SEAT CUSHION SHIELD LH
(a) Remove the 2 screws.
(b) Using a screwdriver, disengage the claws and remove the
cushion shield.
Claw HINT:
Tape the screwdriver tip before use.
B67447
2005 SIENNA REPAIR MANUAL (RM1163U)
Author : Date : 3283
72-38 SEAT - REAR NO. 1 SEAT ASSEMBLY LH (CAPTAIN SEAT
TYPE)
10. REMOVE RECLINING ADJUSTER INSIDE COVER LH
(a) Remove the 3 screws.
(b) Using a screwdriver, disengage the claws and remove the
reclining adjuster inside cover.
Claw HINT:
Tape the screwdriver tip before use.
B67448
11. 7-Passenger:
REMOVE REAR SEAT RECLINING COVER INNER LH
(a) Remove the 2 screws.
(b) Using a screwdriver, disengage the claws and remove the
reclining cover inner.
HINT:
Tape the screwdriver tip before use.
B67449
12. 7-Passenger:
Claw REMOVE RECLINING ADJUSTER INSIDE COVER LH
(a) Remove the screw.
(b) Using a screwdriver, disengage the claws and remove the
reclining adjuster inside cover.
HINT:
Tape the screwdriver tip before use.
B67450
13. REMOVE REAR SEAT 3 POINT TYPE BELT ASSY INNER
(a) Remove the bolt and belt.
14. REMOVE FOLD SEAT STOPPER BAND ASSY
(a) Remove the screw and fold seat stopper band.
15. 7-Passenger RH:
REMOVE REAR NO.1 SEAT ARMREST ASSY LH
(a) Using a screwdriver, pry out the armrest No. 1 cap.
(b) Remove the bolt and armrest.
HINT:
Tape the screwdriver tip before use.
B67443
2005 SIENNA REPAIR MANUAL (RM1163U)
Author : Date : 3284
SEAT - REAR NO. 1 SEAT ASSEMBLY LH (CAPTAIN SEAT 72-39
TYPE)
16. 7-Passenger RH:
REMOVE REAR SEAT ARMREST ASSY RH
(a) Using a screwdriver, pry out the armrest No. 1 cap.
(b) Remove the bolt and armrest.
HINT:
Tape the screwdriver tip before use.
B67260
17. REMOVE REAR SEATBACK BOARD LH
(a) Remove the rear seatback board cap.
(b) Remove the 2 screws.
(c) Remove the seatback board by pulling it out in the arrow
mark direction shown in the illustration.
Claw
B67461
18. 7-Passenger RH:
REMOVE REAR SEATBACK LOCK BEZEL UPPER
(a) Remove the clip and screw.
Claw (b) Using a screwdriver, disengage the front side claws.
(Front side) HINT:
Tape the screwdriver tip before use.
(c) Apply firm pressure in the directions shown to disengage
Claw (Back side) back side claw and remove the seatback lock bezel up-
B67466 per.
19. REMOVE NO.1 SEATBACK COVER LH
(a) Disengage the claw, and remove the 2 headrest supports.
(b) Remove the hog rings and seatback cover together with
the pad.
(c) Remove the hog rings and seatback cover.
B60977
20. REMOVE NO.1 SEAT CUSHION COVER SUB-ASSY LH
(a) Remove the hog rings between seat cushion cover and cushion frame wire and remove the seat cush-
ion cover together with the pad.
(b) Remove the hog rings between the seat cushion cover and the pad.
21. 7-Passenger RH:
REMOVE REAR SEAT SHOULDER BELT COVER RH
(a) Remove the 2 screws and seat shoulder belt cover.
2005 SIENNA REPAIR MANUAL (RM1163U)
Author : Date : 3285
72-40 SEAT - REAR NO. 1 SEAT ASSEMBLY LH (CAPTAIN SEAT
TYPE)
22. REMOVE NO.1 SEATBACK FRAME SUB-ASSY
(a) 7-Passenger RH:
Remove the screw and seatback hinge cover.
(b) 7-Passenger RH:
Remove the nut and seat belt retractor.
(c) Remove the 4 bolts and seatback frame.
23. REMOVE REAR SEAT HINGE COVER LH
(a) Remove the screw and seat hinge cover.
24. REMOVE REAR SEAT HINGE COVER NO.2 LH
(a) Remove the screw and seat hinge cover.
25. REMOVE REAR NO.1 SEAT ADJUSTER ASSY INNER LH
(a) Remove the 2 bolts and seat adjuster.
26. REMOVE RECLINING CONNECTING PIPE LH
27. 7-Passenger RH:
REMOVE REAR NO.1 SEAT BELT ASSY OUTER RH
(a) Remove the 3 nuts and seat belt reclining sensor together with the seat belt.
28. REMOVE REAR SEATBACK ADJUSTER ASSY
OUTER LH
(a) Disengage the reclining remote control cable.
(b) Remove the 3 bolts and seatback adjuster.
B67456
29. REMOVE REAR SEAT TRACK ADJUSTING HANDLE
LH
(a) Using a screwdriver, disengage the pin and remove the
seat track adjusting handle.
HINT:
Tape the screwdriver tip before use.
B67457
30. REMOVE RECLINING CONTROL LINK SUB-ASSY LH
(a) Remove the nut.
(b) Remove the E-ring and reclining control link.
31. REMOVE NO.1 SEAT CUSHION FRAME SUB-ASSY LH
(a) Remove the 5 bolts and seat cushion frame.
2005 SIENNA REPAIR MANUAL (RM1163U)
Author : Date : 3286
SEAT - REAR NO. 1 SEAT ASSEMBLY LH (CAPTAIN SEAT 72-41
TYPE)
32. INSTALL NO.1 SEAT CUSHION FRAME SUB-ASSY LH
(a) Install the seat cushion frame with the bolt.
Torque:
20.6 Nm (210 kgfcm, 15 ftlbf) for except 7-Passenger RH, M8 bolt
41 Nm (418 kgfcm, 30 ftlbf) for M10 bolt
33. INSTALL REAR SEATBACK ADJUSTER ASSY OUTER LH
(a) Install the seatback adjuster assy outer with the bolt.
Torque:
55 Nm (561 kgfcm, 41 ftlbf) for 7-Passenger RH
43.1 Nm (439 kgfcm, 32 ftlbf) for except 7-Passenger
(b) Install the reclining remote control cable.
34. 7-Passenger RH:
INSTALL REAR NO.1 SEAT BELT ASSY OUTER RH
(a) Install the reclining sensor together with the seat belt with the nut.
Torque: 4.0 Nm (41 kgfcm, 35 inlbf)
35. INSTALL REAR NO.1 SEAT ADJUSTER ASSY INNER LH
(a) Install the seat adjuster with the bolt.
Torque: 43.1 Nm (439 kgfcm, 32 ftlbf)
36. INSTALL NO.1 SEATBACK FRAME SUB-ASSY
(a) Install the seatback frame with the bolt.
Torque:
43.1 Nm (439 kgfcm, 32 ftlbf) for 7-Passenger RH inside
55 Nm (561 kgfcm, 41 ftlbf) for 7-Passenger RH outside
43.1 Nm (439 kgfcm, 32 ftlbf) for others
(b) Install the seat belt retractor with the nut.
Torque: 42 Nm (428 kgfcm, 31 ftlbf)
37. INSTALL NO.1 SEAT CUSHION COVER SUB-ASSY
Hog Ring Pliers (a) Install the seat cushion pad to the seat cushion cover.
(b) Using hog ring pliers, install the seat cushion cover to the
seat cushion pad with new hog rings .
NOTICE:
S Be careful not to damage the cover.
S When installing the hog rings, take care to prevent
wrinkles as much as possible.
B50126
38. INSTALL NO.1 SEATBACK COVER LH
Hog Ring Pliers (a) Install the seatback pad.
(b) Using hog ring pliers, completely install the seatback cov-
er with new hog rings.
NOTICE:
S Be careful not to damage the cover.
S When installing the hog rings, take care to prevent
wrinkles as much as possible.
B50126
2005 SIENNA REPAIR MANUAL (RM1163U)
Author : Date : 3287
72-42 SEAT - REAR NO. 1 SEAT ASSEMBLY LH (CAPTAIN SEAT
TYPE)
(c) Attach a rubber wire with new hog rings, as shown in the
illustration.
(d) Using hog ring pliers, install new hog rings.
NOTICE:
S Be careful not to damage the cover.
S When installing the hog rings, take care to prevent
wrinkles as much as possible.
(e) Install the 2 headrest supports.
Rubber Wire
B67458
39. 7-Passenger:
INSTALL REAR SEAT ARMREST ASSY RH
(a) Install the armrest with the bolt.
Torque: 37 Nm (377 kgfcm, 27 ftlbf)
(b) Install the seat armrest No. 1 cap.
40. 7-Passenger:
INSTALL REAR NO.1 SEAT ARMREST ASSY LH
(a) Install the armrest with the bolt.
Torque: 37 Nm (377 kgfcm, 27 ftlbf)
(b) Install the seat armrest No. 1 cap.
41. INSTALL REAR SEAT 3 POINT TYPE BELT ASSY INNER
(a) Install the inner belt with the bolt.
Torque: 42 Nm (428 kgfcm, 31 ftlbf)
42. INSTALL REAR NO. 1 SEAT ASSY LH
(a) Place the seat in the cabin.
NOTICE:
Be careful not to damage the body.
(b) Install the seat.
(c) 7-Passenger RH:
Install the seat belt anchor plate with the bolt.
Torque: 42 Nm (428 kgfcm, 31 ftlbf)
(d) Install the headrest.
(e) When sliding the seat, check that the both sides of the adjuster lock simultaneously.
HINT:
Check that the seat adjuster locks.
2005 SIENNA REPAIR MANUAL (RM1163U)
Author : Date : 3288
◦ Jabse Service Manual Search 2026 ◦ Jabse Pravopis ◦ onTap.bg ◦ Other service manual resources online : Fixya ◦ eServiceinfo