Service Manuals, User Guides, Schematic Diagrams or docs for : . Car Manuals Toyota Sienna 2004-2007 Approved SRM 39 20uh7 w040001

<< Back | Home

Most service manuals and schematics are PDF files, so You will need Adobre Acrobat Reader to view : Acrobat Download Some of the files are DjVu format. Readers and resources available here : DjVu Resources
For the compressed files, most common are zip and rar. Please, extract files with Your favorite compression software ( WinZip, WinRAR ... ) before viewing. If a document has multiple parts, You should download all, before extracting.
Good luck. Repair on Your own risk. Make sure You know what You are doing.


Image preview - the first page of the document
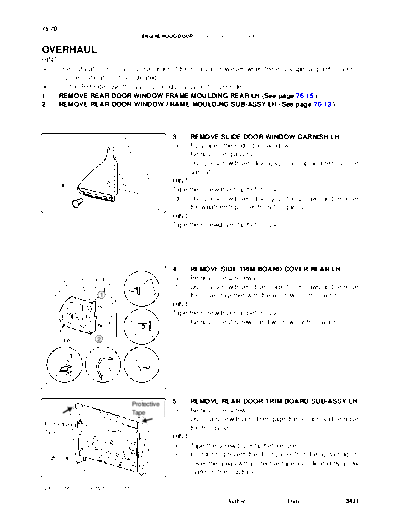
w040001


>> Download w040001 documenatation <<

Text preview - extract from the document
75-70
                                           ENGINE HOOD/DOOR     -   POWER SLIDE DOOR
                                                                                                                  750M2-02


OVERHAUL
HINT:
S         The installation is in the reverse order of the removal. However, when there is a special point concern-
          ing the installation, it is indicated.
S         On the RH side, use the same procedures as on the LH side.
1.        REMOVE REAR DOOR WINDOW FRAME MOULDING REAR LH (See page 76-15 )
2.        REMOVE REAR DOOR WINDOW FRAME MOULDING SUB-ASSY LH (See page 76-13 )


                                                      3.      REMOVE SLIDE DOOR WINDOW GARNISH LH
                                                      (a)     Fully open the slide door window.
                                                      (b)     Remove the glass run.
                                                      (c)     Using a screwdriver, disengage the clip and remove the
                                                              garnish.
                                                      HINT:
      Clip
                                                      Tape the screwdriver tip before use.
                                                      (d) Using a screwdriver, disengage the 2 claws and remove
                                             B67492         the weatherstrip inner from the garnish.
                                                      HINT:
                                                      Tape the screwdriver tip before use.


                                                      4.      REMOVE SIDE TRIM BOARD COVER REAR LH
                                   1                  (a)     Remove the 2 screws.
                                                      (b)     Using a screwdriver, disengage the 8 claws and remove
     5                  1                                     the cover together with the window control switch.
                                                      HINT:
                                                      Tape the screwdriver tip before use.
                                                      (c) Remove the 2 screws and window control switch.
          4                            2
     : Claw      3     2


      5
                            4      3


                                             B67491


                                   Protective         5.      REMOVE REAR DOOR TRIM BOARD SUB-ASSY LH
                                   Tape               (a)     Remove the screw.
                                                      (b)     Using a screwdriver, disengage the 9 clips and remove
Protective
                                                              the trim board.
Tape
                                                      HINT:
                                                      S       Tape the screwdriver tip before use.
                                                      S       In order to prevent the door panel from being damaged,
       : Clip
                                                              cover the areas with protective tape as indicated by arrow
     B67493
     B67513                                  B69309           marks in the illustration.

 2005 SIENNA REPAIR MANUAL (RM1163U)

                                                                          Author :             Date :               3431
                                                                                                          75-71
                                   ENGINE HOOD/DOOR       -   POWER SLIDE DOOR

                                                  (c)   Using a clip remover, remove the 6 clips and weatherstrip
                                                        No. 2.
                                                  (d)   Using a screwdriver, disengage the 11 claws and remove
                                                        the weatherstrip inner from trim board.
                                                  HINT:
                                                  Tape the screwdriver tip before use.


                                                  (e)   w/ Sunshade:
                           Bezel                        Remove the sunshade.
 Curtain
                                                        (1) Remove the 7 screws and sunshade bezel.
                                          (2)           (2) Remove the 4 screws and curtain.


                                   (1)
  B67513                                 B69307


                                                  6.    REMOVE SLIDE DOOR WINDOW ASSY LH
                                                  (a)   w/ Sunshade:
                                                        Remove the sun shade hook.
                                                  (b)   Remove the bolt and window frame.


                                         B69208


                                                  (c)   Remove the bolt.
                                                  (d)   Loosen the nut.
                                                  (e)   Push the window frame rear lower in the direction indi-
                                                        cated by the arrow mark in the illustration.


                                         B67495


                                                  (f) Remove the 2 hole plugs.
                                                  (g) Move the window until the bolts appear in the service
                                                      holes.
                                                  NOTICE:
                                                   S  Do not damage the window.
                                                   S  When the bolts are removed, the window may fall and
                                                      become deformed.
                                                  (h) Remove the 2 bolts and window.
                                         B67494


2005 SIENNA REPAIR MANUAL (RM1163U)

                                                                   Author :              Date :            3432
75-72
                                   ENGINE HOOD/DOOR     -   POWER SLIDE DOOR

7.      REMOVE REAR DOOR GLASS WEATHERSTRIP ASSY OUTER LH (See page 76-18 )
                                  8.  REMOVE SLIDE DOOR
                                  (a) Remove the rear door scuff plate (See page 76-27 ).
                                  (b) Remove the back door scuff plate (See page 76-27 ).
                                  (c) Remove the quarter trim panel (See page 76-27 ).
                                  (d) Remove the upper rail cushion from the rail.


                                                (e)   Disconnect the 2 connectors from the body side and re-
                                                      move the bolt and wire.


                                       B68386


                                                (f)   Open the quarter glass.
                                                (g)   Using a screwdriver, disengage the clip and 2 claws, re-
                                                      move the rail end moulding.
                                                HINT:
                                                Tape the screwdriver tip before use.


           Claw
           Clip                        B68589


                                                (h)   Remove the 2 bolts and bracket center No. 2 together
                              Tensioner
                                                      with the tensioner (color: white).
                                 Bracket        (i)   Remove the tensioner from the bracket center No. 2.


                                       B68936


                                                (j)   Remove the 2 bolts and bracket center No. 1 together
                                                      with the tensioner (color: black).
                                                (k)   Remove the tensioner from the bracket center No. 1.
                          Bracket
                          Tensioner


                                       B68937


 2005 SIENNA REPAIR MANUAL (RM1163U)

                                                                  Author :             Date :            3433
                                                                                                            75-73
                                 ENGINE HOOD/DOOR        -   POWER SLIDE DOOR

                                                 (l)   Remove the 2 nuts and open stop.


                                        B67901


                      Roller Lower               (m)   Rotate the base of the slide door roller lower in the direc-
                                                       tion indicated by arrow in the illustration and then remove
       Rail Lower                                      the roller from the cut area of the lower rail from the body
                                                       side.


                                        B60924


                                                 (n)   Move the slide door rearward and then remove the slide
                         Roller Upper
                                                       door roller upper from the cut area in the rear part of the
                                                       slide door rail upper.


  Rail Upper
                                        B69213


                                                 (o)   Move the slide door further rearward and then remove the
                             Rail Center               slide door hinge center from the rear part of the slide door
                                                       rail center. Then, remove the slide door.


Hinge Center


                                        B69212


2005 SIENNA REPAIR MANUAL (RM1163U)

                                                                   Author :             Date :               3434
75-74
                                   ENGINE HOOD/DOOR     -   POWER SLIDE DOOR

9.       REMOVE SLIDE DOOR RAILS
(a)      Remove the roof headlining (See page 76-27 ).
(b)      Remove the 2 bolts, 2 nuts and the rail upper.
(c)      Remove the 2 screws and rear side rail.
(d)      Remove the 3 screws and rail center.


                                                10.   REMOVE SLIDE DOOR ATTACHMENT CONTROL LH
                                                (a)   Remove the 2 screws, bolt and inside handle.


      B67507                           B69312


                                                (b)   Disconnect the connectors from the lock actuator, the
                                                      power window regulator motor and lock release motor
                                                      and power slide door lock.
                                                (c)   Disengage the control wires.
                                                (d)   Remove the 8 bolts and attachment control.


                                       B67500


                                                (e) Remove the nut and window frame rear lower.
                                                NOTICE:
                                                When the nut is removed, the window frame may fall and
                                                become deformed.
                                                HINT:
                                                Remove the window frame rear lower through the service hole.


       B67495                          B69308


                                                (f)   Remove the control rod.
                                                (g)   Remove the 3 bolts and lock remote control.


                                       B67508


 2005 SIENNA REPAIR MANUAL (RM1163U)

                                                                  Author :           Date :            3435
                                                                                                      75-75
                                 ENGINE HOOD/DOOR      -   POWER SLIDE DOOR

                                               (h)   Remove the 2 screws and lock actuator.


                                      B67508


                                               (i)   Remove the 2 screws and lock release motor.


                                      B67508


                                               (j)   Remove the 3 screws and power window regulator motor.


                                      B67508


                                               (k)   Remove the half stop control lever and door lock control
                                                     bellcrank.
                                               (l)   Remove the 4 bolts and the window regulator.


                                      B68933


                                               11.   REMOVE REAR DOOR OUTSIDE HANDLE COVER LH
    Cover                                      (a)   Remove the outside handle hole cover.
                                               (b)   Using a torx


◦ Jabse Service Manual Search 2026 ◦ Jabse PravopisonTap.bg ◦ Other service manual resources online : FixyaeServiceinfo