Service Manuals, User Guides, Schematic Diagrams or docs for : . Car Manuals Toyota Sienna 2004-2007 Approved SRM 45 05sie quickref
<< Back | HomeMost service manuals and schematics are PDF files, so You will need Adobre Acrobat Reader to view : Acrobat Download Some of the files are DjVu format. Readers and resources available here : DjVu Resources
For the compressed files, most common are zip and rar. Please, extract files with Your favorite compression software ( WinZip, WinRAR ... ) before viewing. If a document has multiple parts, You should download all, before extracting.
Good luck. Repair on Your own risk. Make sure You know what You are doing.
Image preview - the first page of the document
>> Download quickref documenatation <<
Text preview - extract from the document
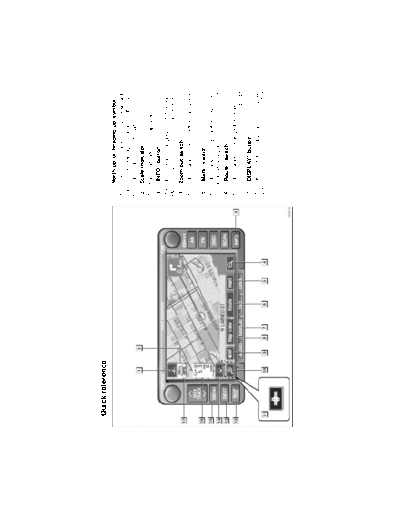
-- Quick reference
                             1       North-up or heading-up symbol
                            This symbol indicates a map view with
                            north-up or heading-up. Touching this sym-
                            bol changes the map orientation. . . . . . . . 9
                             2       Scale indicator
                            This figure indicates the map scale. . . . . 9
                             3       "INFO" button
                            Push this button to display the "Information
                            Menu" screen. . . . . . . . . . . ii, 96, 101, 110
                             4       Zoom out switch
                            Touch this switch to reduce the map scale.
                            .................................... 9
                             5       "Mark" switch
                            Touch this switch to register the cursor posi-
                            tion as a memory point. . . . . . . . . . . . . . . . 6
                             6       "Route" switch
                            Touch this switch to change the route.
                            . . . . . . . . . . . . . . . . . . . . . . . . . . . . . . . . 42, 44
                             7       "DISPLAY" button
                            Push this button to display the "Display"
                            screen. . . . . . . . . . . . . . . . . . . . . . . . . . . . 108


                     viii
 8   "Map View" switch                                               15       "MENU" button
Touch this switch to obtain information re-                          Push this button to display the "Menu"
garding the route to the destination and infor-                      screen. . . . . . . . . . . . . . . . . . . . . . . xii, 17, 61
mation about the POI (Points of Interest) on                         16 Distance and time to destination
the map screen. . . . . . . . . . . . . . 49, 51, 52
                                                                     Displays the distance and the estimated
 9   "AOFF" switch                                                   travel time to the destination. . . . . . . . . . 57
Touch this switch to obtain a broader view.                          17 "GPS" mark (Global Positioning
Some of the switches on the screen are not                                    System)
displayed. They reappear by touching the
"ON "" switch. . . . . . . . . . . . . . . . . . . . . . 89          Whenever your vehicle is receiving signals
                                                                     from the GPS, this mark is displayed.
10 Zoom in switch
                                                                     . . . . . . . . . . . . . . . . . . . . . . . . . . . . . . . . . . . 10
Touch this switch to magnify the map scale.
.................................... 9
11 Foot print map switch
Touch this switch to display the foot print
map and the building information. . . . . . 58
12 "MAP/VOICE" button
Push this button to repeat a voice guidance,
cancel one touch scroll, start guidance and
display the current position. . . . . . 5, 6, 42
13 "DEST" button
Push this button to display the "Destination"
screen. . . . . . . . . . . . . . . . . . . . . . . . . . . x, 20
14 Screen configuration switch
Touch this switch to change the screen
mode. . . . . . . . . . . . . . . . . . . . . . . . . . . . . . 53


                                                                                                       ix
-- "Destination" screen
                              To search for a destination, the switches
                              below perform the following operations.
                               1       "Address" switch
                              You can input the house number and the
                              street address by using the input keys.
                              . . . . . . . . . . . . . . . . . . . . . . . . . . . . . . . . . . . 22
                               2       "POI Name" switch
                              You can select one of the many POIs (Points
                              of Interest) that have already been stored in
                              the system's database. . . . . . . . . . . . . . . 26
                               3       "POI Category" switch
                              You can select a destination from the POI
                              category. . . . . . . . . . . . . . . . . . . . . . . . . . . 29
                               4       "Previous" switch
                              You can select a destination from any of the
                              last 99 previously set destinations and from
                              the previous starting point. . . . . . . . . . . . 34
                               5       "Memory" switch
                              You can select the location from those regis-
                              tered as "Memory points". (To register
                              memory points, see page 66.) . . . . . . . . 33
                               6       "Emergency" switch
                              You can select one of the three categories
                              of emergency service points that have been
                              already stored in the system's database.
                              . . . . . . . . . . . . . . . . . . . . . . . . . . . . . . . . . . . 32

                          x
 7       "Map" switch                                                      13    Home switch
You can select a destination simply by                                     You can select your own home without en-
touching the location on the displayed map.                                tering the address each time. To use this
. . . . . . . . . . . . . . . . . . . . . . . . . . . . . . . . . . . 34   function, it is necessary to set the "Attribute"
 8       "Intersection" switch                                             for the memory point. (To register "Home",
                                                                           see page 70.) . . . . . . . . . . . . . . . . . . . . . . 22
You can enter the names of two intersecting
                                                                           14 "Change" switch
streets. This is helpful if you do not know the
specific street address of your destination                                To change the search area, touch this
but know the general vicinity. . . . . . . . . . 35                        switch. . . . . . . . . . . . . . . . . . . . . . . . . . . . . 20
 9       "Freeway Ent./Exit" switch
You can enter the name of a freeway (inter-
state) entrance or exit. . . . . . . . . . . . . . . . 36
10 "Phone #" switch
You can enter a destination by the telephone
number. . . . . . . . . . . . . . . . . . . . . . . . . . . . 37
 11 "Coordinates" switch
You can set a destination using latitude and
longitude as coordinates. . . . . . . . . . . . . 37
12 Quick access switch
You can select one of 5 preset destinations
directly. To use this function, it is necessary
to set the "Attribute" for each memory point.
(To register a "Quick Access", see page 70.)
. . . . . . . . . . . . . . . . . . . . . . . . . . . . . . . . . . . 22


                                                                                                          xi
-- "Menu" screen
                         The switches below perform the follow-
                         ing operations.
                          1       "Map DVD" switch
                         Displays information regarding the disc ver-
                         sion or covered area. . . . . . . . . . . . . . . . . 12
                          2       "Select User" switch
                         Enables recall of up to three memorized user
                         setting patterns. . . . . . . . . . . . . . . . . . . . . 63
                          3       "Setup" switch
                         Enables various settings for the navigation
                         system. . . . . . . . . . . . . . . . . . . . . . . . . . . . 76
                          4       "My Places" switch
                         Enables changes to "Memory points" and
                         "Areas to avoid". . . . . . . . . . . . . . . . . . . . . 66
                          5       "Suspend Guidance" and "Resume
                                  Guidance" switch
                         Suspends or resumes guidance. . . . . . . 62
                          6       "Volume" switch
                         Sets the volume for voice guidance.
                         . . . . . . . . . . . . . . . . . . . . . . . . . . . . . . . . . . . 63


                   xii
◦ Jabse Service Manual Search 2026 ◦ Jabse Pravopis ◦ onTap.bg ◦ Other service manual resources online : Fixya ◦ eServiceinfo