Service Manuals, User Guides, Schematic Diagrams or docs for : . Car Manuals Toyota Tundra 2000-2006 Approved 04-06 techinfo.toyota.com ileaf 06toyrm 06toypdf 06rmsrc 06tundra lu2uzfe oilpum remo
<< Back | HomeMost service manuals and schematics are PDF files, so You will need Adobre Acrobat Reader to view : Acrobat Download Some of the files are DjVu format. Readers and resources available here : DjVu Resources
For the compressed files, most common are zip and rar. Please, extract files with Your favorite compression software ( WinZip, WinRAR ... ) before viewing. If a document has multiple parts, You should download all, before extracting.
Good luck. Repair on Your own risk. Make sure You know what You are doing.
Image preview - the first page of the document
>> Download remo documenatation <<
Text preview - extract from the document
LU-8
       LUBRICATION (2UZ-FE)   -   OIL PUMP
                                                                                  LU08Q-11


                     REMOVAL
                     HINT:
                     When repairing the oil pump, the oil pan and strainer should be
                     removed and cleaned.
                     1.    REMOVE ENGINE FROM VEHICLE
                           (2WD: See page EM-79)
                           (4WD: See page EM-92)
                     2.    INSTALL ENGINE TO ENGINE STAND FOR DIS-
                           ASSEMBLY
                     3.    REMOVE TIMING BELT (See page EM-16)
                     4.    REMOVE NO.1 IDLER PULLEY (See page EM-16)
                     5.    REMOVE NO.2 IDLER PULLEY (See page EM-16)
                     6.    REMOVE CRANKSHAFT TIMING PULLEY
                           (See page EM-16)
                     7.    REMOVE CRANKSHAFT POSITION SENSOR
                           (See page IG-11)


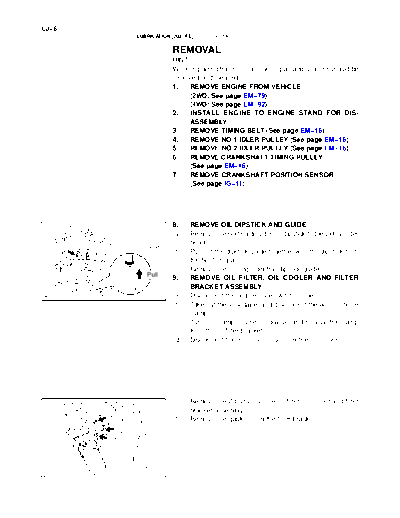
                     8.    REMOVE OIL DIPSTICK AND GUIDE
                     (a)   Remove the bolt holding the oil dipstick to the LH cylinder
                           head.
       O-Ring
                     (b)   Pull out the dipstick guide together with the dipstick from
                           the No.1 oil pan.
                     (c)   Remove the O-ring from the dipstick guide.
          Pull
                     9.    REMOVE OIL FILTER, OIL COOLER AND FILTER
                           BRACKET ASSEMBLY
            B05837   (a)   Disconnect the oil pressure switch connector.
                     (b)   Take out the vinyl tape, and disconnect the wire from the
                           clamp.
                     (c)   Turn the clamp counterclockwise, and remove the clamp
                           from the oil filter bracket.
                     (d)   Disconnect the oil cooler hose from the oil cooler.


                     (e)   Remove the 2 bolts, nut, the oil filter, oil cooler and filter
                           bracket assembly.
                     (f)   Remove the gasket from the filter bracket.


            B05838
                                                                                      LU-9
                LUBRICATION (2UZ-FE)   -   OIL PUMP


    SST         SST            10. REMOVE NO.2 OIL PAN
                               (a) Remove the 24 bolts and 2 nuts.
                               (b) Insert the blade of SST between the No.1 and No.2 oil
                                   pans, cut off applied sealer and remove the No.2 oil pan.
                                   SST 09032-00100
                               NOTICE:
                                S  Be careful not to damage the No.2 oil pan contact sur-
                                   face of the No.1 oil pan.
                      Z02375    S  Be careful not to damage the No.2 oil pan flange.

                               11. REMOVE OIL PAN BAFFLE PLATE
                               Remove the 7 bolts, 2 nuts and baffle plate.


                      B05839


                               12.   REMOVE NO.1 OIL PAN
                               (a)   Remove the 18 bolts and 2 nuts.


                      B05840


                               (b)  Using a screwdriver, remove the No.1 oil pan by prying
                                    between the oil pan and cylinder block in the sequence
                                    shown.
                               NOTICE:
                               Be careful not to damage the contact surface of the cylin-
          Pry                  der block and No.1 oil pan.
LH Side


RH Side


                      B05841
LU-10
        LUBRICATION (2UZ-FE)   -   OIL PUMP

                      13. REMOVE OIL STRAINER
                      Remove the 2 bolt, 2 nuts, oil strainer and gasket.


             B05842


                      14. REMOVE OIL PUMP
                      (a) Remove the 8 bolts.
                      HINT:
                      Use a 6 mm hexagon wrench for the hexagon head bolt.


             B01044


                      (b)  Using a screwdriver, remove the oil pump by prying the
                           portions between the oil pump and cylinder block.
                      NOTICE:
                      Be careful not to damage the contact surface of the cylin-
                      der block and oil pump.
                      (c) Remove the O-ring from the cylinder block.


             B00951
◦ Jabse Service Manual Search 2026 ◦ Jabse Pravopis ◦ onTap.bg ◦ Other service manual resources online : Fixya ◦ eServiceinfo