Service Manuals, User Guides, Schematic Diagrams or docs for : . Car Manuals Toyota Camry Toyota Toyota_30 Spoiler_Install
<< Back | HomeMost service manuals and schematics are PDF files, so You will need Adobre Acrobat Reader to view : Acrobat Download Some of the files are DjVu format. Readers and resources available here : DjVu Resources
For the compressed files, most common are zip and rar. Please, extract files with Your favorite compression software ( WinZip, WinRAR ... ) before viewing. If a document has multiple parts, You should download all, before extracting.
Good luck. Repair on Your own risk. Make sure You know what You are doing.
Image preview - the first page of the document
>> Download Spoiler_Install documenatation <<
Text preview - extract from the document
TOYOTA CAMRY 2002 - REAR SPOILER
Section I - Installation Preparation
Part Number: PT29A-33022-XX (Unit Pack)
PT29A-33050-XX (Unit Pack)
Section I - Installation Preparation
Kit Contents
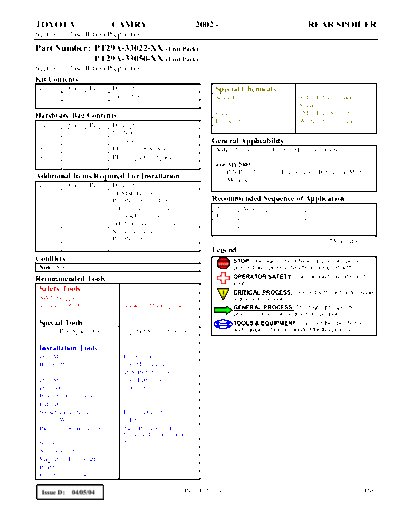
Item # Quantity Reqd. Description Special Chemicals
1 1 Camry Spoiler Sealant 3MTM Ultra-Pro Body
Sealant
Hardware Bag Contents Cleaner 3MTM Prep Solvent-70
Lubricant White Lithium Grease
Item # Quantity Reqd. Description
1 2 M6 Nut
2 2 Grommet General Applicability
3 1 LH Torque Rod Spacer Note: Applicable for LE/S E/XLE Grade Camry
4 1 RH Torque Rod Spacer
For MY2005:-
- P/N PT29A-33050-01 (color code 1C8 (Lunar Mist
Additional Items Required For Installation Metallic)) is new colors.
Item # Quantity Reqd. Description
1 1 CHMSL Hole Cover
P/N PT29A-33021-XX Recommended Sequence of Application
-11 Light Gray (interior) Item # Accessory
-12 Black (interior) 1
-41 Pebble Beige (in terior) 2
2 1 Spoiler Template 3
P/N PT29A-33023 *Mandatory
Legend
Conflicts STOP: Damage to the vehicle may occur. Do not
STOP
Note: None proceed until process has been complied with.
Recommended Tools OPERATOR SAFETY: Use caution to avoid risk of
injury.
Safety Tools CRITICAL PROCESS: Proceed with caution to ensure
Safety Goggles a quality installation.
Vehicle Protection Blankets, Masking Tape GENERAL PROCESS: This highlights specific
processes to ensure a quality installation.
Special Tools TOOLS & EQUIPMENT: Calls out the specific tools
Torque Rod Spacer Tool Toyota SST # 09804-24010 and equipment recommended for this process.
Installation Tools
Drill Motor 1/2" Chuck
Hole Cutter 3/4" Michigan Drill
(P/N HC690 - 3/4")
Drill Stops 3/4", Letter "S"
Drill Bit Letter "S"
Hole De-burring Tool
Ratchet
Socket and Extension 10 mm Deep Well
Torque Wrench 0-100 lbf-in
Panel Clip Removal Tool Panel Pry Tool # 1
Toyota SST # 00002-06001-01
Screwdriver Phillips #2
Shop Vacuum
Magnet w/ Flex Shaft
Heat Gun
Fuse Removal Tool
Issue D: 04/05/04 Page 1 of 9 pages DIO
TOYOTA CAMRY 2002 - REAR SPOILER
Section II - Installation Procedure
Section II - Installation Procedure
A. Vehicle Preparation
1. Open the driver door. Remove the Driver
Side J/B cover. (Fig. A-1) J/B Cover
STOP 2. Remove and save the 15A STOP fuse using a
Fuse Removal Tool. (Fig. A-2)
Fig. A-1
B. Trim Panel Removal
STOP 1. Store parts safely for reinstallation later. Fuse Removal Tool
2. Open trunk lid.
3. Remove the emergency trunk release handle 15A STOP Fuse
cover. (Fig. B-1)
NOTE: If the clips on the handle cover are
broken, replacement cover can be ordered under
P/N 69298-AA020.
4. Remove the emergency trunk release handle. Fig. A-2
(Fig. B-2)
5. Remove the plastic clips holding the inner
trunk lid trim panel and remove the panel.
Tool Notch
Plastic Trim
Removal Tool
Fig. B-1
Fig. B-2
Issue D: 04/05/04 Page 2 of 9 pages DIO
TOYOTA CAMRY 2002 - REAR SPOILER
Section II - Installation Procedure
6. Remove the two (2) clips on both side lower
trunk trim panels. (Fig. B-3) Clips
7. Using a Phillips screwdriver, remove the
Cargo Net hooks on the left and right hand
side of the inner trunk. (Fig. B-3)
8. Unhook both trunk trim panels from behind Phillips
the rear plastic panel. Carefully fold back the Phillips Screwdriver
Screw
panels. They do not need to be removed. Fig. B-3
C. Installation of Torque Rod Spacers
CAUTION: Prop open the trunk lid while the
torque rod spacers are installed.
STOP 1. Apply a small spot of white lithium grease on
the torque rod spacer where it meets the
torque rod, prior to installing into the hinge
arm.
2. Using the special torque rod tool, rotate the
TOYOTA SPECIAL TOOL
torque rod forward in the passenger side arm SST#09804-24010 Fig. C-1
slot. (Fig. C-1 & Fig. C-2)
3. Install torque rod spacer as shown on the
outside of the arm. (Fig. C-3)
4. Repeat for driver side of vehicle.
NOTE: The parts are stamped LC & RC for the
left and right hand side of the vehicle.
D. Hole Drilling
STOP 1. Prior to drilling, you must lay protective
Fig. C-2
covers on the bumper and fender areas to
protect from metal debris caused during the
drilling process.
2. Eye protection must be worn during the
drilling process.
Fig. C-3
Issue D: 04/05/04 Page 3 of 9 pages DIO
TOYOTA CAMRY 2002 - REAR SPOILER
Section II - Installation Procedure
STOP 3. Apply masking tape to the trunk lid surface
in the area of the hole locations. (Fig. D-1)
NOTE: The above step is not necessary if the
trunk lid surface is covered with protective
polywrap (RapGuard).
4. Place the Mylar drilling template on the trunk
lid as shown and tape in place making sure it
is aligned along the front and sides of the
trunk lid and is completely smooth and flat
on trunk lid surface. (Fig. D-2) Fig. D-1
5. Locate the five (5) hole locations on the
Mylar template. (Fig. D-2)
NOTE: The hole centers are the punch marks
within the segmented circles. The punch marks
on the template are not always in the center of
the segmented circles. The punch marks on the
template must be located and used for proper
spoiler alignment.
6. Using a center punch, lightly center punch
the five (5) hole locations. (Fig. D-3)
Fig. D-2
7. Remove the Mylar template. Make certain
you can see the five center punch locations.
Save the template for future use. Hammer
Center Punch
STOP 8. Set the drill stops on both the 3/4" hole cutter
and letter "S" drill bit to 3/8". (Fig. D-4)
Fig. D-3
3/4"
Hole "S" Drill
Cutter
3/8"
Fig. D-4
Issue D: 04/05/04 Page 4 of 9 pages DIO
TOYOTA CAMRY 2002 - REAR SPOILER
Section II - Installation Procedure
9. Using the letter "S" drill bit, drill the two (2)
holes located as shown. (Fig. D-5)
"S" Drill Bit
10. Using the 3/4" hole cutter bit, drill the three
(3) holes located as shown. (Fig. D-6)
11. Using a deburring tool, carefully debur the
five (5) drilled holes. (Fig. D-7)
STOP 12. Vacuum the surface of the trunk lid and the
surrounding drilled areas.
i. For vehicles with protective polywrap
(RapGuard) remove the polywrap. Drill Motor, 3/4" Hole Cutter,
Letter "S" Drill Bit Fig. D-5
ii. Otherwise remove the masking tape.
13. Before opening the trunk lid, use a magnet
3/4" Hole Cutter
with a flexible shaft to fish out the 3/4" hole
plugs and drill chips.
14. Open the trunk lid using the trunk lever by
the driver's seat. Grasp it and with an up and
down motion, vigorously shake the trunk lid
to dislodge any metal chips remaining from
drilling process. Use a magnet with a
flexible shaft to remove any remaining chips.
NOTE: Do not shake the trunk lid against the
Fig. D-6
hinge stops, nor with any keys in the trunk lock.
E. Preparation for Spoiler Attachment
STOP 1. The trunk and spoiler should be a minimum
of 600 F for proper set-up of adhesive tape.
Use a hot air blower to heat the surface if the
temperature is below 600 F. The adhesive
Hole Deburring Tool,
tape on the spoiler must have full contact Flexible Shaft Magnet
between spoiler and trunk lid for proper
sealing to trunk lid.
2. The trunk lid where the spoiler attaches must Fig. D-7
be cleaned with 3MTM Prep Solvent-70.
i. When cleaning with 3MTM Prep
Solvent-70 follow the manufacturer's
directions. Do not allow cleaner to air dry.
Issue D: 04/05/04 Page 5 of 9 pages DIO
TOYOTA CAMRY 2002 - REAR SPOILER
Section II - Installation Procedure
3. After cleaning, apply 3MTM Ultra-Pro Body
Sealant to all five (5) drilled hole edges.
F. Attaching the Spoiler to the Trunk Lid
1. Remove the vinyl covers from the two (2)
threaded M6 studs. (Fig. F-1)
2. Remove the plastic liners from the two (2)
Fig. F-1
outboard adhesive pads. Be careful not to
touch or allow any contaminants to come into
contact with adhesive pads. (Fig. F-1)
3. Place a plastic grommet on to the plastic
studs toward the front of each spoiler
footprint. (Fig. F-2 & Fig. F-3)
STOP NOTE: The grommet has a tiny interior clip that
holds the grommet to the stud. Make sure you
Fig. F-2
install the grommet with the interior clip
forward. When properly installed, it will snap in
place and cannot be removed.
4. Position the spoiler over the trunk lid with Interior Grommet
Clip
the drill holes aligned to the spoiler studs.
(Fig. F-4)
NOTE: The foam blocks from the spoiler
packaging can be used to aid in positioning of the
spoiler over the drilled hole locations.
Fig. F-3
Foam Blocks
Fig. F-4
Issue D: 04/05/04 Page 6 of 9 pages DIO
TOYOTA CAMRY 2002 - REAR SPOILER
Section II - Installation Procedure
5. Feed the wiring harness through the middle
hole on the passenger side of the vehicle.
Remove the foam block from the passenger
side and gently lower the spoiler.
(Fig. F-4 & Fig. F-5)
6. Remove the driver side foam block and lower
the spoiler down into place and press down
on both sides to fully seat grommets.
Continue to apply pressure to ensure
complete adhesion of spoiler to trunk lid Fig. F-5
surface. (Fig. F-6)
7. Open the trunk lid and install the two (2)
flange nuts to the studs. Tighten the nuts to
6 N-m (53 lbf-in) of torque. (Fig. F-7)
G. Center High Mounted Stop Lamp (CHMSL)
Removal and Film Cover Application
1. In backseat - grasp the CHMSL housing and
push it to the left (passenger side) to
disengage clips. Lift the forward most edge
of the CHMSL housing and remove it from
Fig. F-6
the package tray. (Fig. G-1)
2. Tip the CHMSL housing and up and push the
power connector release button to release the
power source from the light socket.
Well Attaching Nut Locations
10 mm Deep Well Socket,
Ratchet, Torque Wrench Fig. F-7
Fig. G-1
Issue D: 04/05/04 Page 7 of 9 pages DIO
TOYOTA CAMRY 2002 - REAR SPOILER
Section II - Installation Procedure
3. Carefully remove the CHMSL from the
CHMSL housing by flexing the housing and
disengaging the clips. (Fig. G-2)
4. Select appropriate CHMSL cover blackout
film color. Peel the film from its liner and
apply it to the red CHMSL lens as shown.
Fig. G-2
The bottom edge of the film is straight and
has two locator slits along the edge. It is
butted up against the top of two molded tabs
on the lens and the slits should line up side to
side with the molded tabs. (Fig. G-3)
Fig. G-3
5. Using your fingers, rub the CHMSL film to
work out all air bubbles. Because there is
some text molded on the surface of the red
lens, the film will not be completely flat.
(Fig. G-4)
6. Remove and discard the light bulb from the
CHMSL light. Reinstall the empty bulb
socket. Fig. G-4
7. Reassemble the CHMSL light and housing.
No portion of the red lens should be visible
from the outside of the housing.
8. Place the CHMSL housing over the package
tray and reconnect the power source
connector to the empty light bulb socket so
that the connector is not loose to rattle under
the package tray.
9. Reinstall the CHMSL housing by reversing
step G. 1..
H. Wire Harness Installation
1. Open the trunk lid and locate the spoiler
wiring harness.
2. Pull the wiring harness out to reach the pre-
installed spoiler harness connector and
connect the spoiler harness connector to Fig. H-1
vehicle harness connector. (Fig. H-1)
Issue D: 04/05/04 Page 8 of 9 pages DIO
TOYOTA CAMRY 2002- REAR SPOILER
Section II - Installation Procedure
I. Reassemble the Vehicle
1. Replace the 15A STOP Fuse in Driver Side
J/B using a Fuse Removal Tool.
2. Replace the Driver Side J/B cover.
3. From within the vehicle, depress the brake
pedal to make sure spoiler brake light and
vehicle brake lights are functioning properly.
4. Reinstall all removed panels and parts. Be
sure that all panel clips are engaged.
TOYOTA CAMRY 2002 - REAR SPOILER
Section III - Functional Verifications
Section III - Functional Verifications
Check: Look For:
Verify spoiler lamp for proper operation. Illumination of spoiler mounted stop lamp.
Verify trunk lid operation. When opened, the trunk lid should initially
pop up slightly and remain in the fully raised
position when opened completely.
Verify acceptable gap. The gap around the edges of the rear spoiler
should be no bigger than 3.0 mm.
Verify that the original red CHMSL lens has No red lens material visible.
been fully covered.
Verify the correct CHMSL cover has been The CHMSL cover color should match the
used. CHMSL housing color.
Issue D: 04/05/04 Page 9 of 9 pages DIO
◦ Jabse Service Manual Search 2026 ◦ Jabse Pravopis ◦ onTap.bg ◦ Other service manual resources online : Fixya ◦ eServiceinfo